Tag: jalapeno

  • King Arthur Flour’s Crispy Cheesy Pan Pizza Review!

    King Arthur Flour’s Crispy Cheesy Pan Pizza Review!

    For the past few weeks, I have been seeing photo after photo of mouthwatering pan pizzas all over my social media. This is because like years past, King Arthur Flour announced their recipe of the year. This year did not disappoint. The King Arthur Flour’s 2020 Recipe of the Year is Crispy Cheesy Pan Pizza. Read on for our King Arthur Flour’s Crispy Cheesy Pan Pizza Review!

    I posted the link to King Arthur Flour’s recipe above (we are not affiliated with or sponsored by King Arthur Flour in any way, we’re just fans). Read on for the different choices I made and what I thought of the recipe.

    My Notes and Review

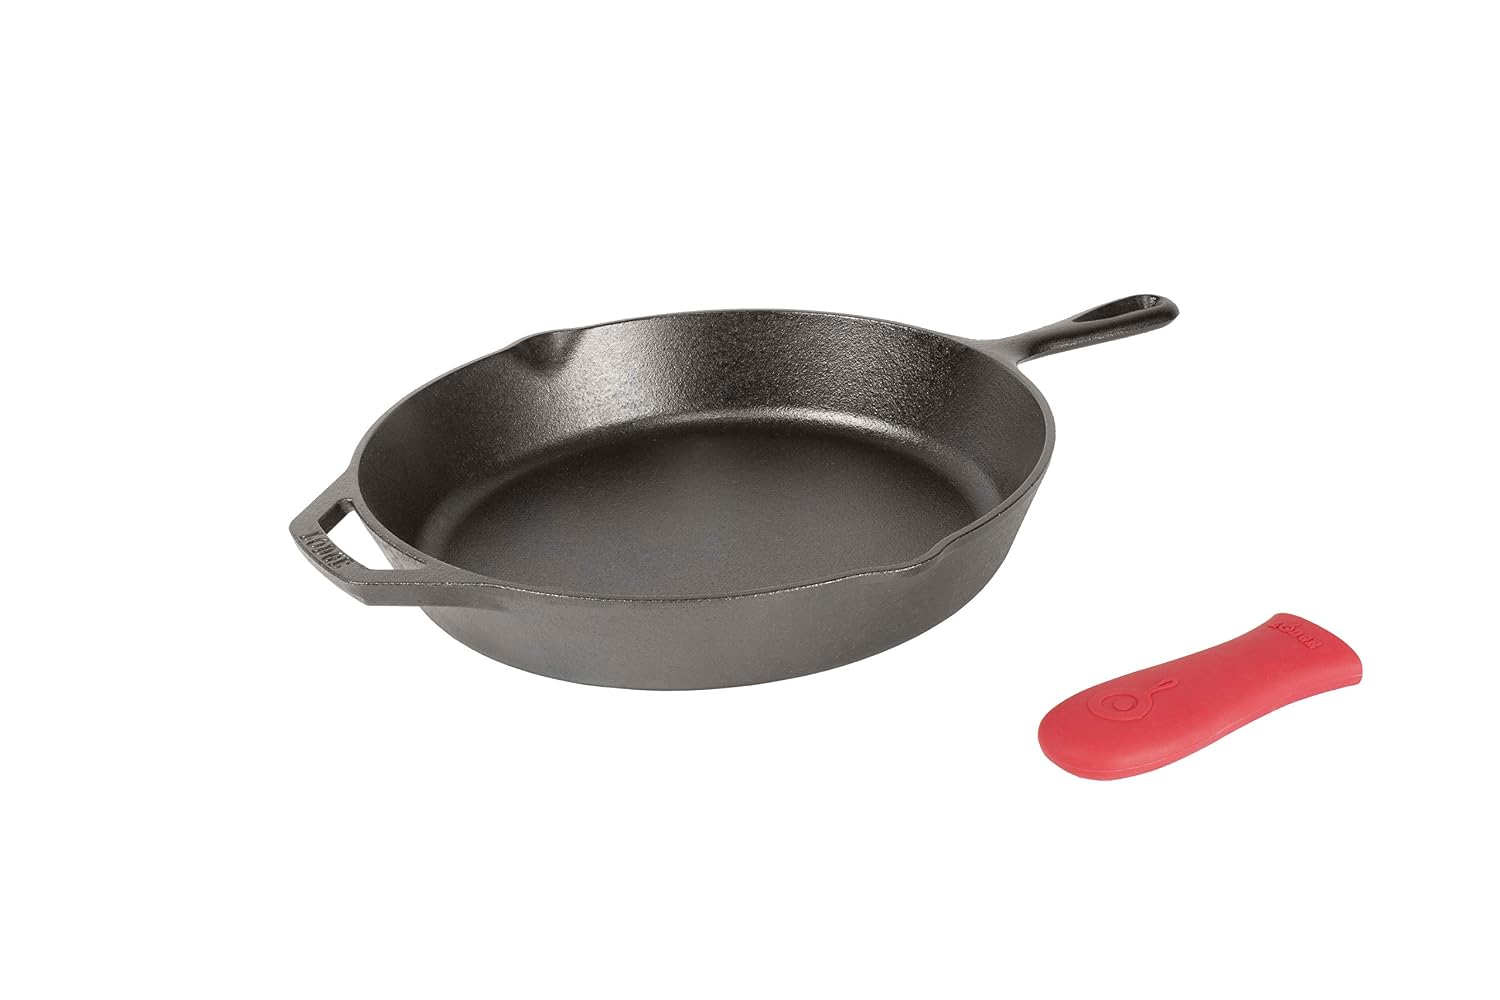
    This isn’t a recipe for a quick weeknight dinner, the dough needs to sit for at least 12 hours. Mine sat overnight. But, it is worth it! I would recommend making this on the weekend or when you are having guests, it really is a showstopper. Note: You will need a cast iron pan.

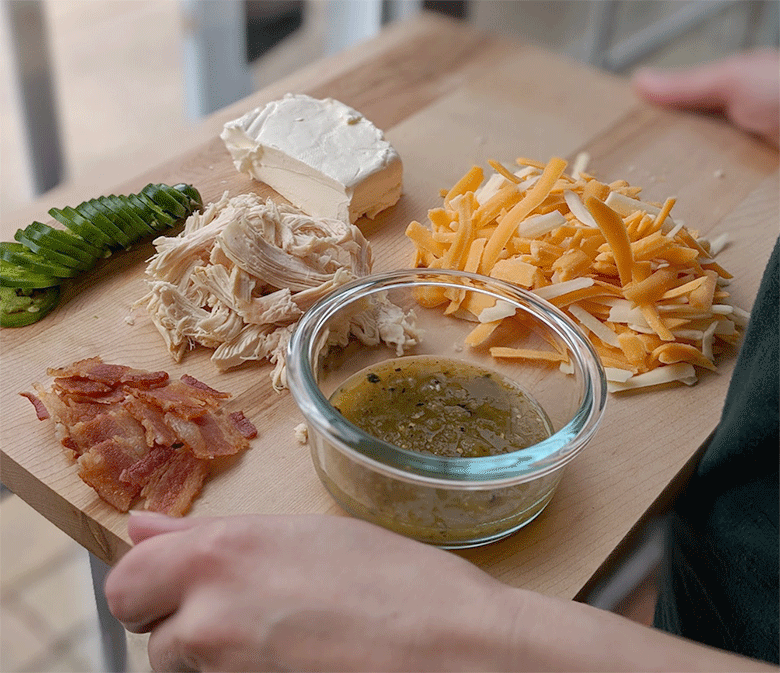
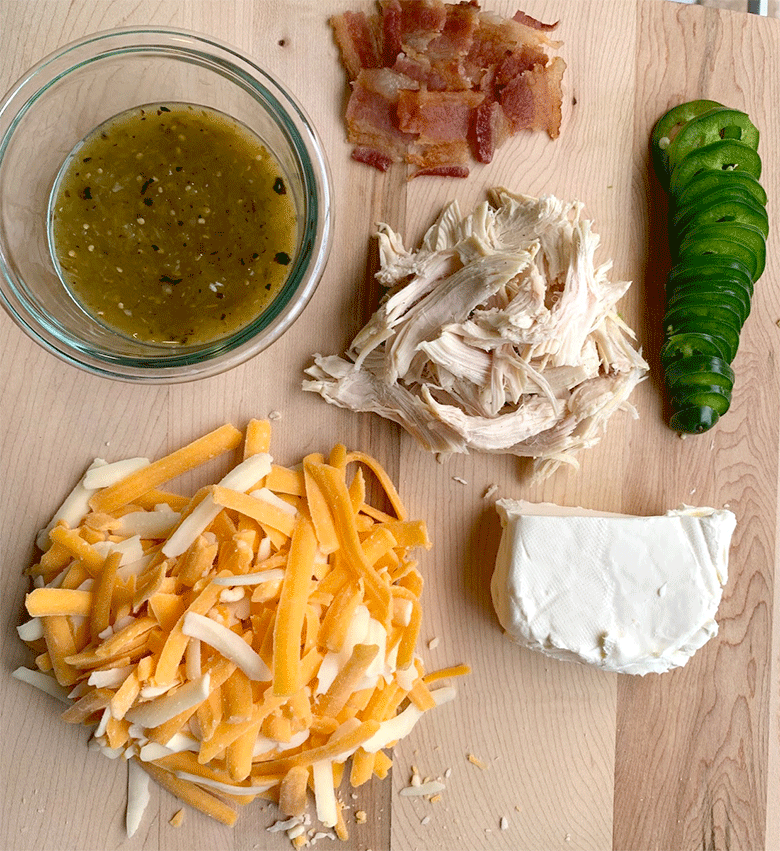
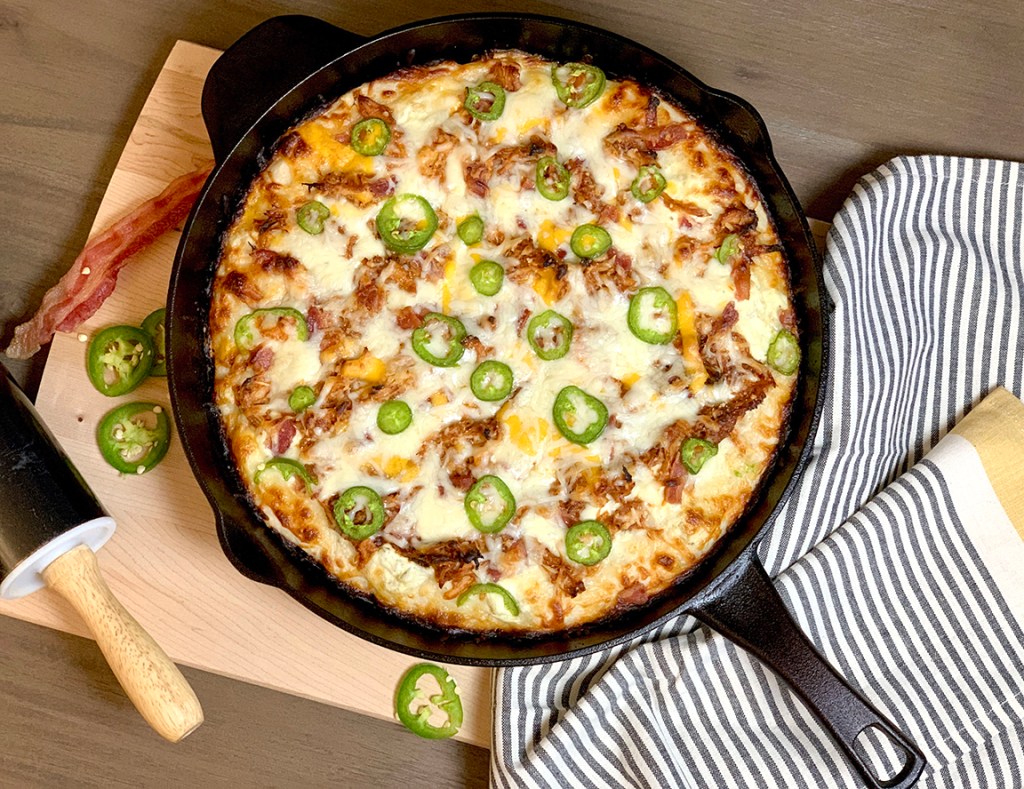
    I chose to make a version of my Cast Iron Jalapeno Popper Pizza with the pan crust from the King Arthur Flour recipe. I followed all the instructions to a T, prepped the dough the day before, dimpled it with my fingers and let it sit out in my cast iron pan for 2 hours before baking. Let me tell you – it came out magnificent! The bottom of the crust was crisp, the inside springy, and the edges were a crunchy, cheesy deliciousness.

    In the pan before baking. Notice the layers of cheese and toppings. Is your mouth watering yet?

    Now, for what I did differently. I used a 12 inch cast iron pan, which is bigger than the recommended size in the recipe. Because of this, the first 1 cup cheese layer didn’t quite cover all of the crust. I just added an extra 1/4 cup of cheese at this step. Then I layered with my cream cheese/salsa verde “sauce”, some bbq chicken, crumbled bacon, more cheese, and sliced jalapeños.

    Look at the gooey cheesiness!

    Final Thoughts

    This pizza turned out mouthwatering. So amazing that my husband couldn’t stop raving about it. Like him, I kept going back for a little bit more. Needless to say, I highly recommend this recipe and will be making many different versions of it in the months to come.

    Other Recipes to Try

  • Cast Iron Jalapeno Popper Pizza Recipe

    Cast Iron Jalapeno Popper Pizza Recipe

    Guys, I love jalapenos. I didn’t used to, in fact as a kid I hated them. But I’ve gracefully aged a few years and have grown to love the spicy little peppers and pretty much everything made with them. So naturally, I thought jalapenos and pizza make a perfect combo, right? That’s why, when I came across a recipe for Jalapeno Popper Pizza over at The Wood Fired Enthusiast, I knew I had to try it.

    Now, I made a few little tweaks to the recipe which I will cover here. I used all the same toppings as the original recipe, but use my own semi-whole wheat pizza dough recipe. My adapted recipe is below.

    1. I made my own semi-whole-wheat pizza dough (recipe coming soon). But honestly, you can make your life easier and buy a store-made pizza dough.

    2. I added shredded rotisserie chicken to my pizza to up the protein. I LOVE using rotisserie chicken in my recipes, it is a great way to use up leftover chicken because you don’t need a whole lot with the rest of the filling ingredients in this pizza.

    3. My special trick to cooking awesome homemade pizza – a cast iron skillet. Don’t have a pizza oven or wood fired oven? Well, neither do I. That’s why I love, love, love my cast iron skillet and it is now the only way I make pizza at home. This is the one I have and use almost every day.

    Cast Iron Jalapeno Popper Pizza

    Ingredients:

    • 4 oz cream cheese, softened
    • 1/4 cup salsa verde
    • 1/4 cup shredded cheddar
    • 1 large jalapeno, thinly sliced
    • 1 1/2 cup shredded colby jack cheese
    • 3 slices cooked, crumbled bacon
    • 3/4 cup shredded or chopped rotisserie chicken
    • 1 ball pre-made pizza dough

    Recipe Process:

    Roll out our your pizza dough with a rolling pin on a cutting board or large tray, something that doesn’t have a ridge or lip on it because we will be moving/sliding the pizza after it has it’s toppings. You’ll need to roll the dough to the approximate size of your cast iron pan, for me that is a 12 inch circle.

    Next, because we will need to move the uncooked pizza, put cornmeal beneath the dough to help the crust move and not stick to the cutting board. It gives the crust a little crunch when cooked that I really like. Look at the picture below, you can do this easily by draping half of the dough over the rolling pin and spreading some cornmeal on the board, then lay that half of the dough back down and do the same on the other side.

    Now it’s time to add the toppings. Mix the cream cheese, salsa verde and cheddar together in a bowl. This will be your “sauce.” You will layer that on the dough, followed by the chicken, bacon, colby jack cheese and finally jalapeno slices.

    Our pizza is ready for baking, but first we need to warm up the cast iron skillet and the oven. Set the oven broiler on high and put the oven rack on the top rack position. Then, put the skillet on the stove over a medium-high heat with a drizzle of olive oil. By doing this before baking, the crust will get crispy on the bottom. Once the skillet is smoking hot, and I mean smoking, we are going to add our pizza. This is the tricky part. Take a large spatula, or pizza peel if you have one, and hold the cutting board with one hand over the skillet, slide the pizza onto the hot pan. Alternately, use two people; one to hold the cutting board and the other to pull the pizza onto the skillet.

    During the transfer, some of the toppings may fall off or the cheese may move around. That’s OK, just put whatever needs to be fixed back in place. Once on the skillet, let the dough cook for about 45 seconds to 1 minute, then transfer the entire skillet to the oven under the broiler. Let the pizza broil for about 4-5 minutes.

    Every oven is different. Be sure to check it’s progress frequently. Take the pizza out when cheese is slightly browned and melted. Enjoy!