Tag: sprinkles

  • Valentine’s Day Hot Cocoa Bombs

    Valentine’s Day Hot Cocoa Bombs

    Valentine's Day Hot Cocoa Bombs

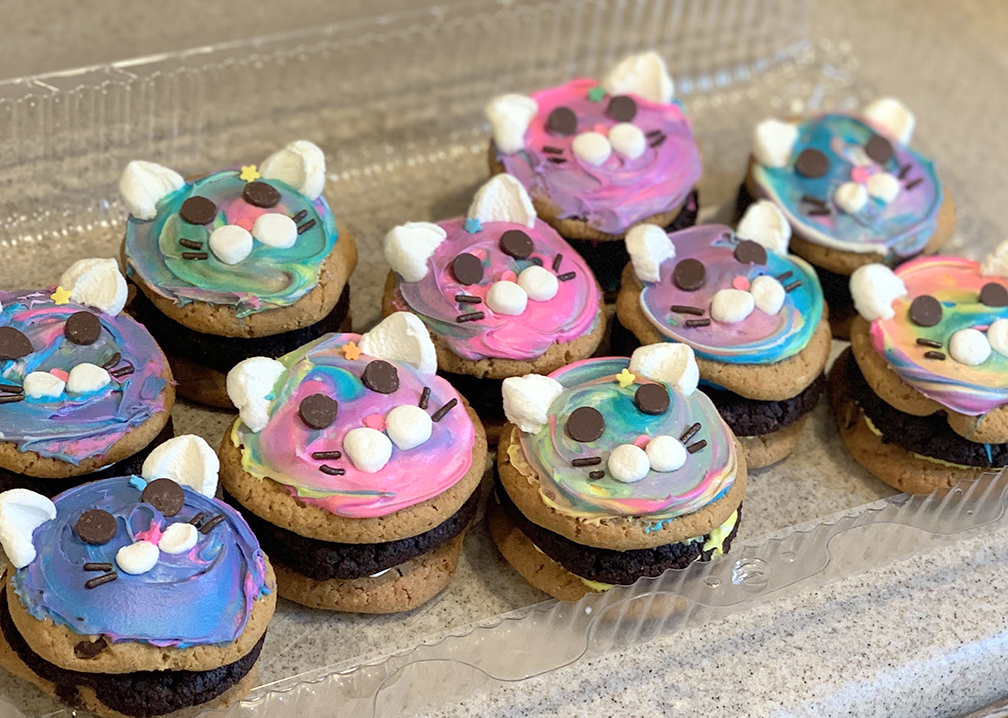
    Valentine’s Day is just around the corner! While we don’t celebrate with anything big and showy, I do try to do a little something fun. This year calls for Homemade Valentine’s Day Hot Cocoa Bombs! Easy to make and fun to decorate, hot cocoa bombs make great homemade gifts or a fun activity for kids and adults alike. A warm sip of delicious hot cocoa in a heart shaped mug is just the kind of Valentine’s Day I am hoping for.

    This post contains affiliate links– thank you for supporting us.

    Ingredients

    Instructions

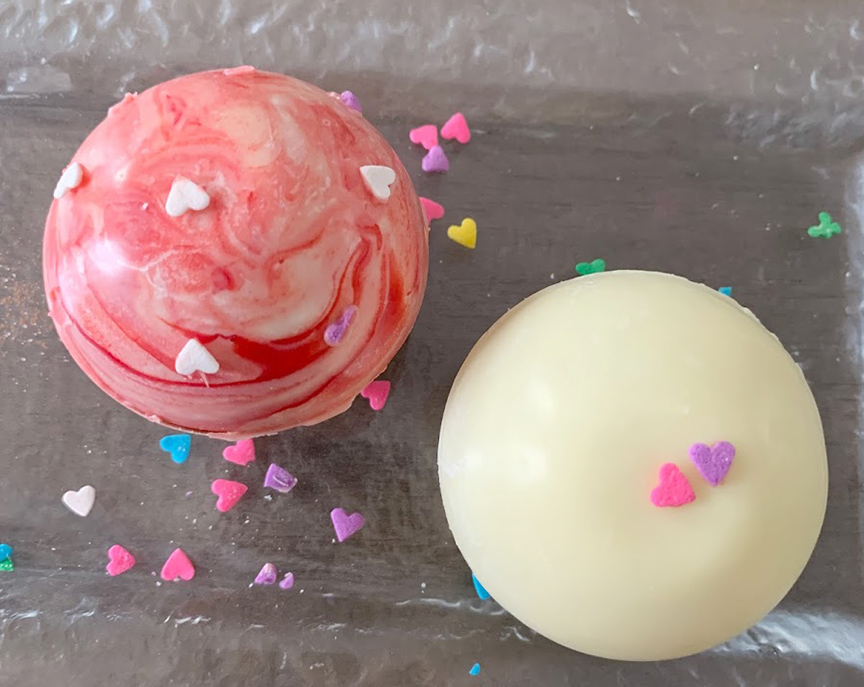
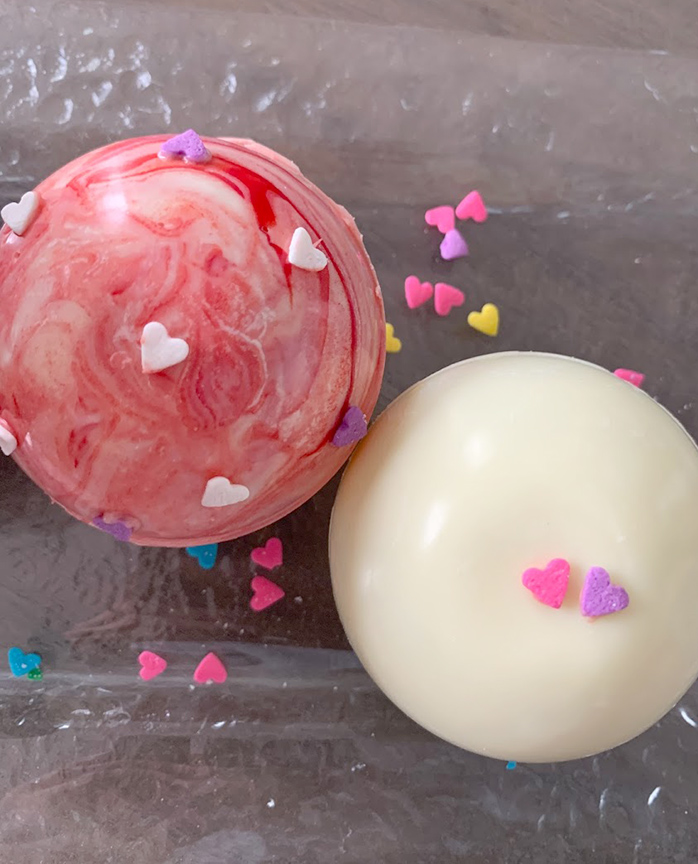
    To make these hot cocoa bombs Valentine’s Day themed, I used white chocolate, red food coloring and heart sprinkles.

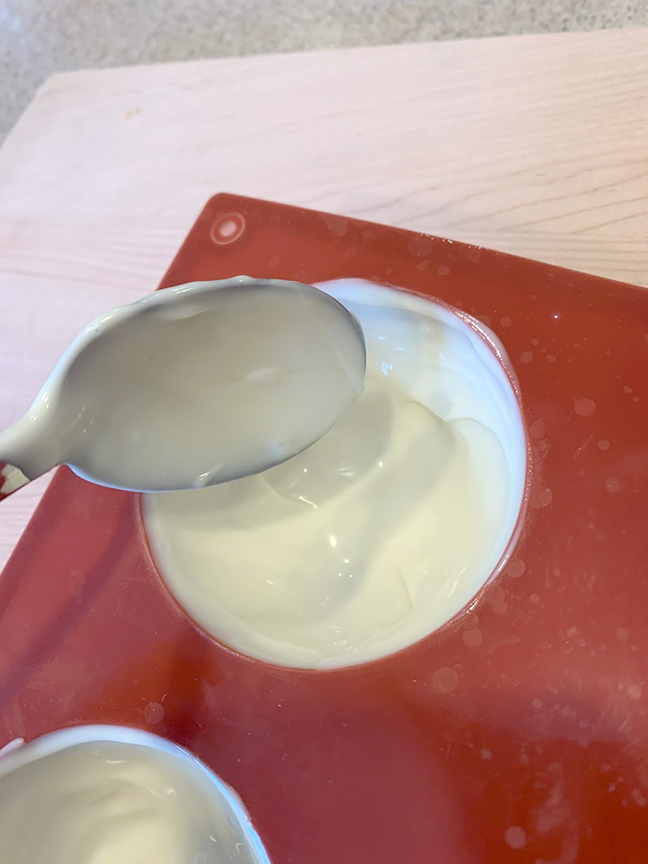
    1. Melt the white chocolate (white chocolate chips, candy melts, etc.). Put in a microwave safe dish and heat for 30 seconds at a time stirring between each heating. Do not overheat!
    2. Once melted, if you want to keep them white, spread the melted white chocolate up the sides of your mold.
    3. If you want to make them marbled with red and pink like in the picture below, put some red food coloring into the melted white chocolate and stir just a little bit so you see both white and red streaks. Then spread the mixture up the sides of the mold. Try not to keep smoothing and spreading because the more you mess with it, the more it will mix into a plain pink and you will lose the marble effect.
    4. Refrigerate for 30 minutes or until the white chocolate has hardened and gently pop them out of the mold.
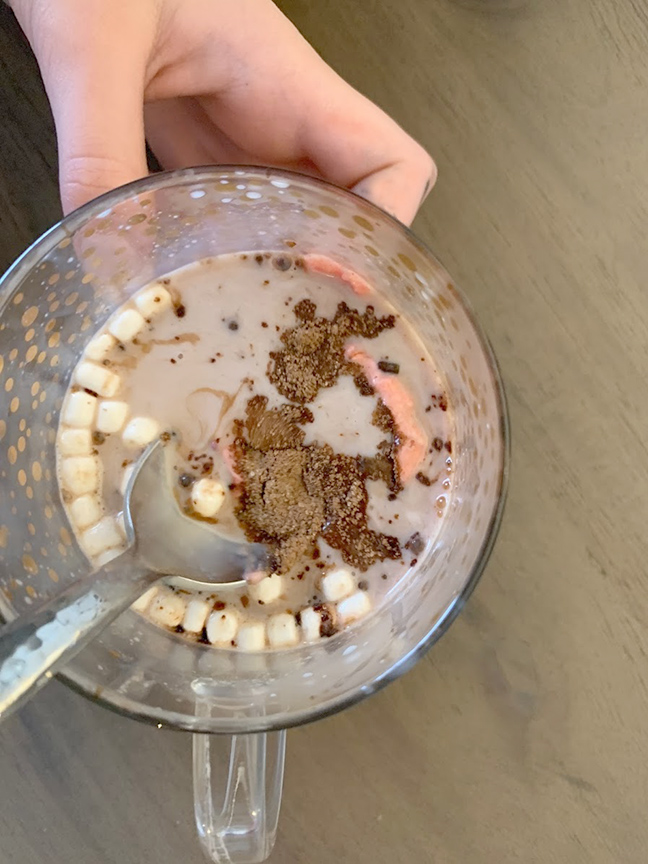
    5. Fill one half of your bomb with hot cocoa mix, sprinkles, mini marshmallows, mini chocolate chips and whatever you would like to include.
    6. Once the bottom half is filled, melt the edges of the top half just enough so there is some softened chocolate and stick it onto the bottom closing the bomb. (To melt the edges, I microwaved a plate until warm and placed the top-half of my bomb on the plate, edge side down. The warmth from the plate was enough to slowly melt the edges of the half circle.) Smooth any melted chocolate around the seam to make a better seal.
    7. Finally, it’s time to decorate! I used some of the melted chocolate to stick heart sprinkles to the outside of my hot cocoa bombs. You could also LIGHTLY drizzle melted chocolate over them or even stick a candy heart on the top. Refrigerate for a few minutes to harden the edges and decorations before using or gifting!

    More from Today I Need A…

    //z-na.amazon-adsystem.com/widgets/onejs?MarketPlace=US&adInstanceId=7c0ce057-f903-4789-99cd-c01ad78c8a63
  • Easy Cat Mini Cookie Cakes

    Easy Cat Mini Cookie Cakes

    I’m going to admit something a little crazy about my daughter…she doesn’t like cake. I know, what kid doesn’t like cake? Don’t get me wrong, she’ll “suffer” through eating it at birthday parties and celebrations, but she definitely doesn’t prefer it. Last year for her birthday I made her a large Triple-Layer Cookie Cake with a chocolate whipped cream frosting which she absolutely loved. Well, now that she’s turning 9, she loves all things miniature. And cats. And tie-dye. So I decided to combine all three and make her these adorable Cat Mini Cookie Cakes!

    The good news is they’re super easy to make and use easy to find ingredients. They were a big hit with family and friends and most importantly my daughter. She LOVED these mini cookie cakes and already asked for me to make them again for her next year. Read on for instructions and ingredient list.

    Easy Cat Mini Cookie Cakes

    Ingredients

    -Cookies – you need 3 for each cake (One of the best things about these cookie cakes is how versatile they are. You can make them smaller, larger, two layer, etc. – choose any cookie size and flavor you want!)
    -Frosting – simple buttercream or can of white frosting – I used this kind Buy at Target
    -Mini Marshmallows
    -Chocolate Chips
    -Chocolate sprinkles – Buy on Amazon
    -Pink round sprinkles – similar to these Buy on Amazon
    -Any fun shaped sprinkles

    Tools

    -Cake Icing Tool, like this Wilton Dessert Decorator – Buy on Amazon
    -Small Offset Spatula, we like this reasonably priced one from Ateco – Buy on Amazon

    Mini Cookie Cake Instructions

    To make this year’s celebration easier, I decided to buy cookies instead of make them. My local grocery store has a bakery and I figured they would be more uniform in size than homemade cookies. I purchased three different flavors for a bit of added fun and because I made each mini cookie cake with three “layers”. I bought standard chocolate chip cookies, M&M candy cookies and chocolate chocolate chip cookies. You could make your own of course, it’s up to you!

    Next up was frosting. I never use canned frosting, but due to time constraints and some home construction I decided to make my life easier. Canned frosting can be very oily which is one of the reasons I usually don’t use it. To make it more of a stiff piping consistency you can add powdered sugar and mix. I then divided it into different bowls and mixed in pink, blue, and yellow food coloring.

    Once you have the frosting ready, assembling your mini cookies cakes is easy. All you need to do is pipe or spread some frosting on one cookie, place the second cookie on top. Then add another layer of frosting and finally the third cookie on top of that. You will have a stack of three cookies with a layer of frosting in between them.

    Decorating your Mini Cookie Cakes

    Once all of your cookie cakes are assembled, it is time to decorate. To get the swirled color effect, I placed a blob of pink, a blob of blue and a blob of yellow frosting on the top cookie. Then, I used my offset spatula in a swirling motion to spread it around the cookie. Sometimes I only used two colors to get different shades and sometimes I swirled more than others just to get a variation in color. NOTE: the more you swirl, the more the colors will start to blend so try to only move your spatula once or twice if possible.

    Next, I added the cat details. For the ears, I cut a mini marshmallow in half and pressed the tops together to make the point of the ears. I also used mini marshmallows for the white mouth parts by cutting them in half and keeping them more rounded. For the eyes, I placed two chocolate chips upside down in the frosting. For the nose I used a pink, flat sprinkle. And finally, for the whiskers I used two long chocolate sprinkles. Extra: For a girly touch, I added a flower sprinkle by an ear on each one.

    Easy Cat Mini Cookie Cakes
    Easy Cat Mini Cookie Cakes

    And that’s it! Have fun assembling these adorable cats for a special cat lover you know. Then, wait for everyone to gush over how cute they are!

    Easy Cat Mini Cookie Cakes

    You Might Also Like…