Category: Home

  • Cast Iron Jalapeno Popper Pizza Recipe

    Cast Iron Jalapeno Popper Pizza Recipe

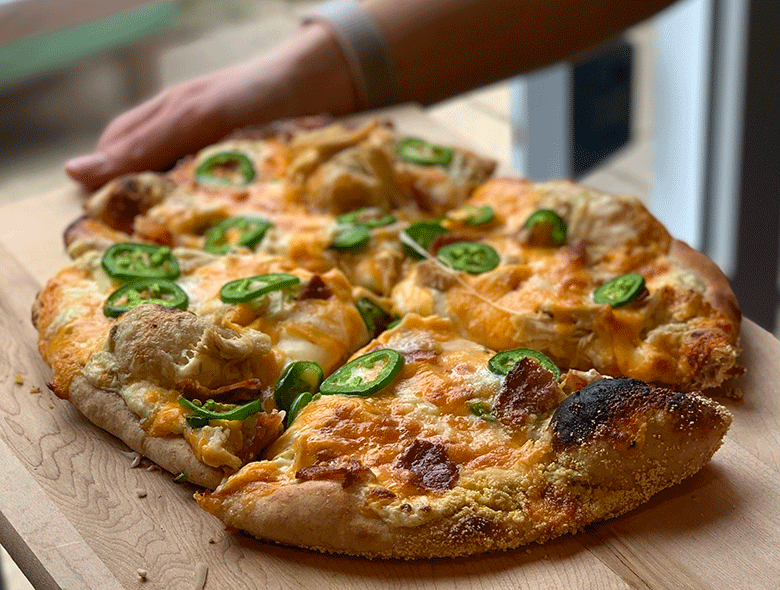
    Guys, I love jalapenos. I didn’t used to, in fact as a kid I hated them. But I’ve gracefully aged a few years and have grown to love the spicy little peppers and pretty much everything made with them. So naturally, I thought jalapenos and pizza make a perfect combo, right? That’s why, when I came across a recipe for Jalapeno Popper Pizza over at The Wood Fired Enthusiast, I knew I had to try it.

    Now, I made a few little tweaks to the recipe which I will cover here. I used all the same toppings as the original recipe, but use my own semi-whole wheat pizza dough recipe. My adapted recipe is below.

    1. I made my own semi-whole-wheat pizza dough (recipe coming soon). But honestly, you can make your life easier and buy a store-made pizza dough.

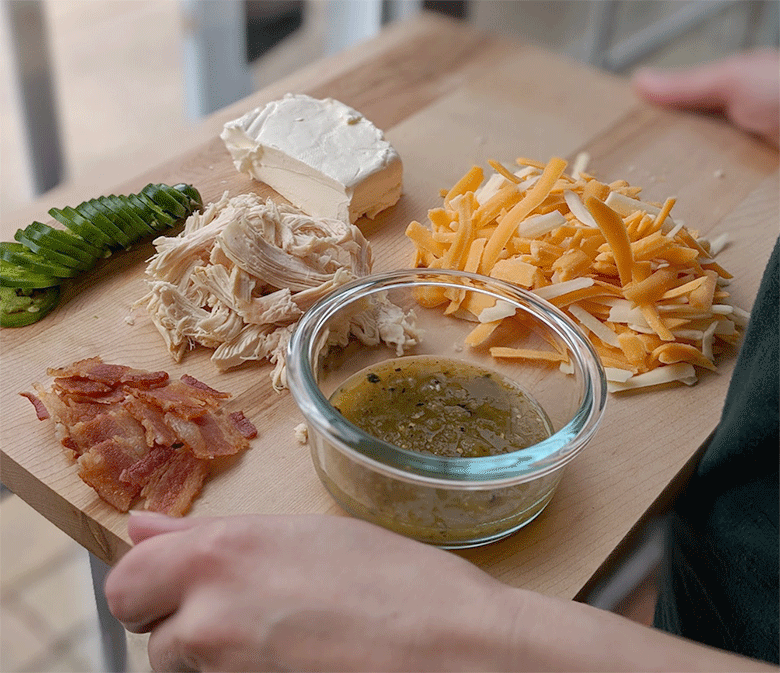
    2. I added shredded rotisserie chicken to my pizza to up the protein. I LOVE using rotisserie chicken in my recipes, it is a great way to use up leftover chicken because you don’t need a whole lot with the rest of the filling ingredients in this pizza.

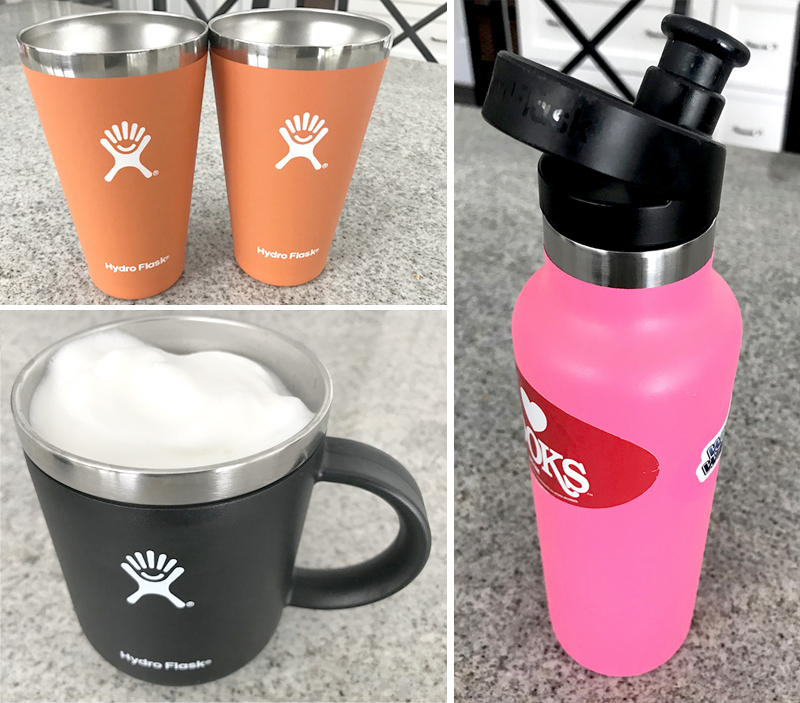
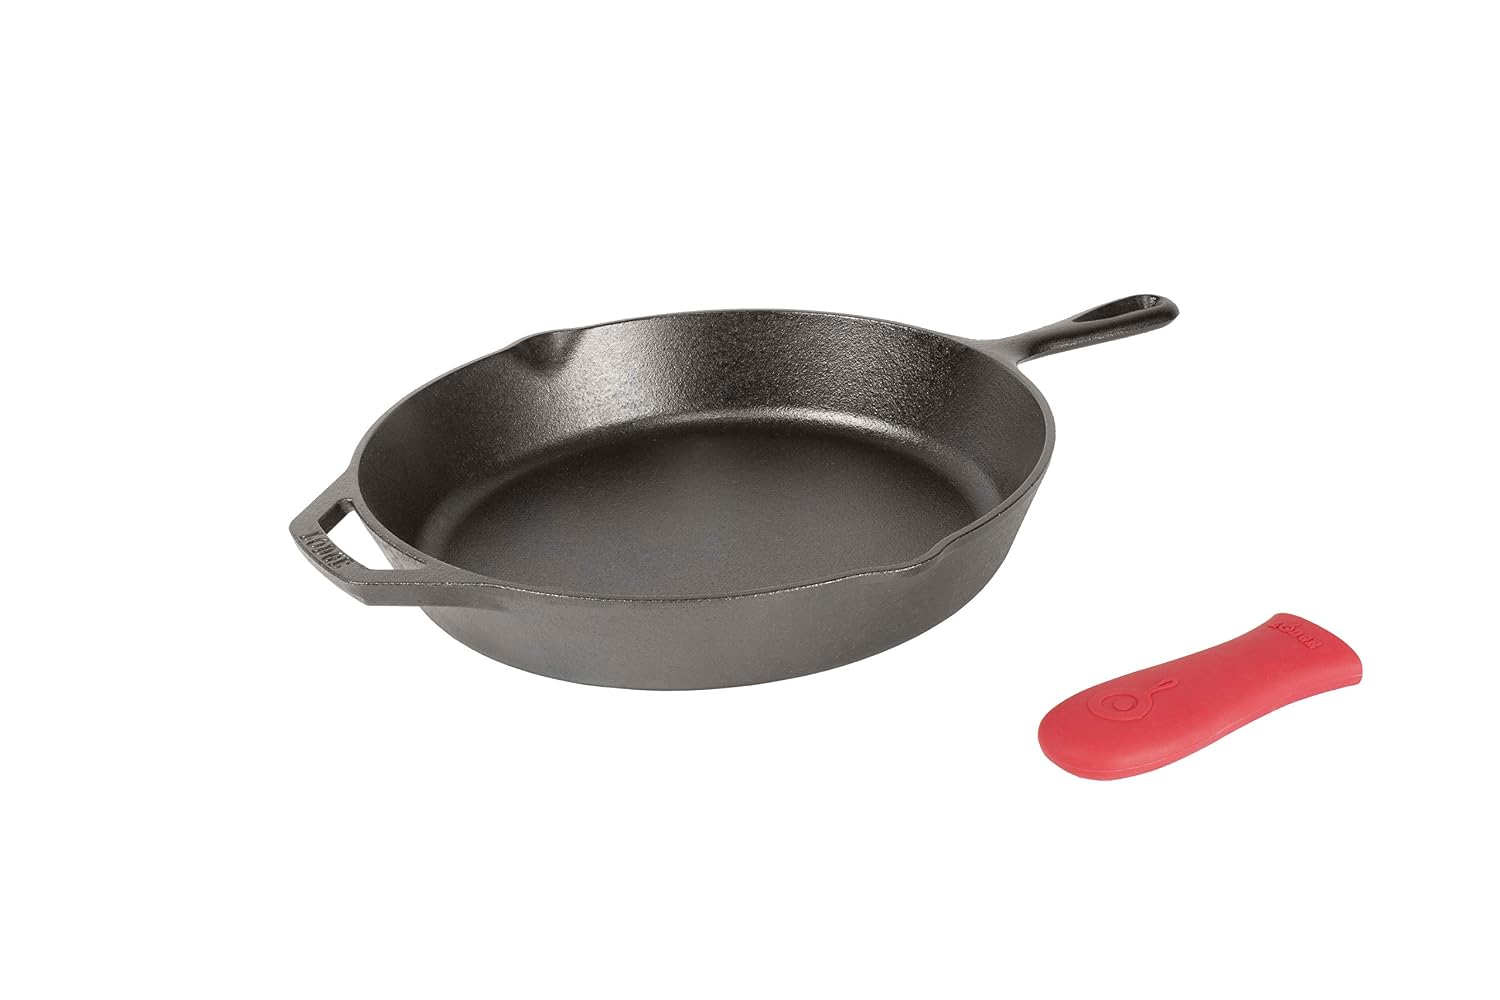
    3. My special trick to cooking awesome homemade pizza – a cast iron skillet. Don’t have a pizza oven or wood fired oven? Well, neither do I. That’s why I love, love, love my cast iron skillet and it is now the only way I make pizza at home. This is the one I have and use almost every day.

    Cast Iron Jalapeno Popper Pizza

    Ingredients:

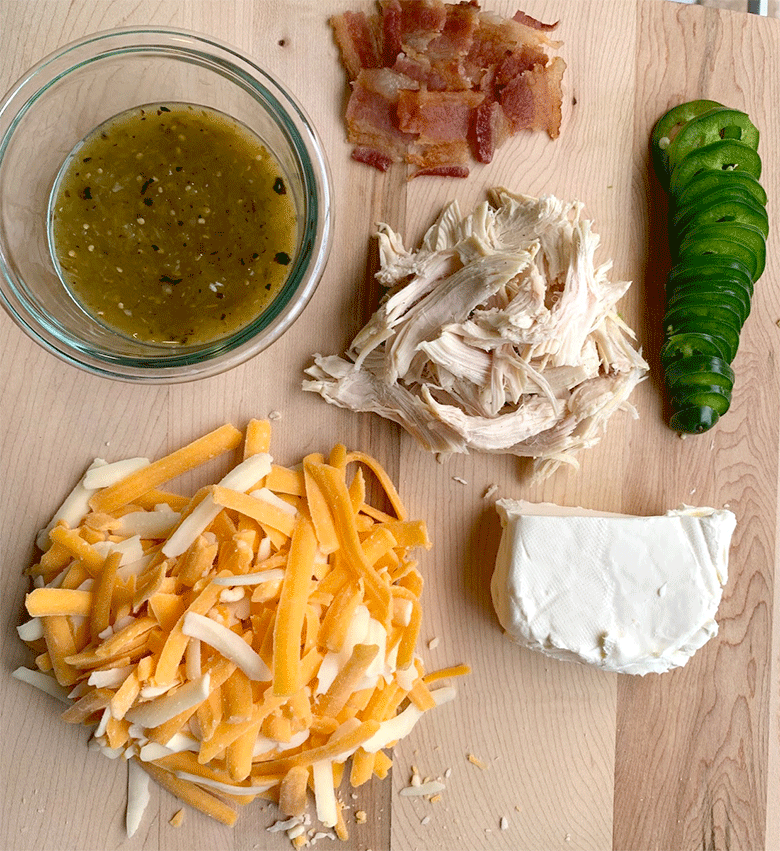
    • 4 oz cream cheese, softened
    • 1/4 cup salsa verde
    • 1/4 cup shredded cheddar
    • 1 large jalapeno, thinly sliced
    • 1 1/2 cup shredded colby jack cheese
    • 3 slices cooked, crumbled bacon
    • 3/4 cup shredded or chopped rotisserie chicken
    • 1 ball pre-made pizza dough

    Recipe Process:

    Roll out our your pizza dough with a rolling pin on a cutting board or large tray, something that doesn’t have a ridge or lip on it because we will be moving/sliding the pizza after it has it’s toppings. You’ll need to roll the dough to the approximate size of your cast iron pan, for me that is a 12 inch circle.

    Next, because we will need to move the uncooked pizza, put cornmeal beneath the dough to help the crust move and not stick to the cutting board. It gives the crust a little crunch when cooked that I really like. Look at the picture below, you can do this easily by draping half of the dough over the rolling pin and spreading some cornmeal on the board, then lay that half of the dough back down and do the same on the other side.

    Now it’s time to add the toppings. Mix the cream cheese, salsa verde and cheddar together in a bowl. This will be your “sauce.” You will layer that on the dough, followed by the chicken, bacon, colby jack cheese and finally jalapeno slices.

    Our pizza is ready for baking, but first we need to warm up the cast iron skillet and the oven. Set the oven broiler on high and put the oven rack on the top rack position. Then, put the skillet on the stove over a medium-high heat with a drizzle of olive oil. By doing this before baking, the crust will get crispy on the bottom. Once the skillet is smoking hot, and I mean smoking, we are going to add our pizza. This is the tricky part. Take a large spatula, or pizza peel if you have one, and hold the cutting board with one hand over the skillet, slide the pizza onto the hot pan. Alternately, use two people; one to hold the cutting board and the other to pull the pizza onto the skillet.

    During the transfer, some of the toppings may fall off or the cheese may move around. That’s OK, just put whatever needs to be fixed back in place. Once on the skillet, let the dough cook for about 45 seconds to 1 minute, then transfer the entire skillet to the oven under the broiler. Let the pizza broil for about 4-5 minutes.

    Every oven is different. Be sure to check it’s progress frequently. Take the pizza out when cheese is slightly browned and melted. Enjoy!

  • Today I Need A…Mother’s Day Gift! Our Mother’s Day Gift Guides for 2019

    Today I Need A…Mother’s Day Gift! Our Mother’s Day Gift Guides for 2019

    Mother’s Day is right around the corner, but don’t panic! We put together some gift ideas so you can shop and order with the click of a mouse. The items below are all different price points and different styles, but I can tell you that I would love to receive ANY of them! Let’s just say I already emailed my husband a link to this page. There’s a list for Amazon and a list for Target, both with easy ordering and fast shipping.

    That being said, Mother’s Day is not all about gifts and many moms would be happy to just spend the day with their family doing something relaxing while knowing that their kids and families thought about them. A homemade card, not having to make dinner, and my kids cleaning their rooms sounds like an amazing Mother’s Day to me. Last year, I asked for hydrangea flowers to plant in my garden; this year I asked for all of us to take a hike along Lake Michigan together. But, I know my husband loves to have something for me to open to help me feel appreciated. Enter this list.

    1 – For Mom’s who love wineModern Copper Stemless Wine Glasses – Chic, useful and along with a bottle of wine you know she’ll love, makes this a gift that says “Sit and relax a while – you deserve it!”
    2 – For Moms who hate to clean iRobot Roomba Vacuum – I know what you’re thinking, I can’t get a vacuum for Mother’s Day! This is definitely a gift you give only if you KNOW the woman you are buying for would appreciate it. I, for one, would love the ability to take one of my daily tasks, like vacuuming, off my list.
    3 – For Moms who love to be comfyLace back PJ’s – These are seriously cute and reviewers say they are incredibly comfortable. It’s a win-win!
    4 – For Moms who love showing off their childrenCustom Initial Necklace – This necklace is a way to personalize a gift for any mom. Whatever the number of kids, you can add a disc pendant for each.
    5 – For Moms who could use some pamperingBath Bomb Gift Set – Bath bombs are everywhere nowadays and for good reason. They feel like a small luxury at the end of a long day or week. This set comes in a super-cute gift box making it a gorgeous gift.
    6 – For Moms who love to be on trendTrendy Resin Hoop Earrings – Resin Earrings are a must-have accessory for any chic mom!
    7 – For Sentimental moms (or really any mom)Letters to My Mom Book – Kids can write letters to their Mom now for her to open later – a time capsule between mother and child. I’m not crying, you’re crying!
    8 – For Moms who love to garden or cookAeroGarden – I know it’s finally spring and many of us are planting our garden outside, but with the AeroGarden, herbs and veggies can be grown year round indoors putting dinner ingredients at your fingertips.

    1 – For Mom’s who loves to journalOne Question a Day for Moms. “What is the funniest thing your child has said recently?”, this five-year journal asks a question like this everyday giving Mom the opportunity to jot down memories she doesn’t want to forget.
    2 – For Mom’s who love wine EcoVessel PORT 10oz Insulated Stainless Steel Stemless Wine Glass. Insulated to keep wine at your desired temperature, a silicone base to keep the glass from slipping, and a 100 year warranty? What more could you ask for? I love the Gold and Blue Moonlight colors.
    3 – For Mom’s who love beauty productsTarget Beauty Box. The all natural mom will love this beauty box full of eco-conscious products.
    4 – For Mom’s who are runners or love musicAnker Wireless Earbuds. I love these wireless earbuds for running and working out, but they can be used for so much more! Listening to music or a podcast wire free makes moving about your day much easier and enjoyable.
    5 – For Mom’s who love to be comfyWomen’s Pajama Set. With 5 star reviews, these pajamas are sure to be a new favorite for bedtime.
    6 – For Mom’s who love their smoothiesNinja Smart Screen Blender DUO. This is the blender we use DAILY to make our protein smoothies. If you want to go a step further, this version, Ninja Professional 1200W Kitchen System – BL685, comes with a food processor bowl too.
    7 – For Mom’s who love jewelry with clean linesMama Bear Bolo Bracelet. A truly versatile bracelet she can wear with any outfit.
    8 – For Sentimental moms (or really any mom) Letter’s To My Mom Book. Kids can write letters to their Mom’s now for her to open later – a time capsule between mother and child. I’m not crying, you’re crying… again!

    *affiliate links

  • Transitional Table Lamps to Brighten your Home

    Transitional Table Lamps to Brighten your Home

    OK Lighting Glass Lamps – Find them on Amazon here: https://amzn.to/2Pvgj7m

    Our house definitely doesn’t have one style to define it. A little modern farmhouse, add some traditional elements, marble, different wood tones and more I just like different objects, textures and looks. And, lot’s of gray and white, especially in our family room. We have a gray couch, white walls, a slate gray fireplace, and white and gray marble tile surround. So with that in mind, I wanted to start bringing in more color to liven things up a bit. To do that, I purchased these OK Lighting teal glass lamps.

    Although these lamps look a little coastal in style, I like how they give my family room a lighter, airy quality. Amazon lists these lamps as “blue” in color. I do not agree with that, they are definitely a teal/sea glass color. The tone of the teal color mixes in nicely with the cool grays and whites in my decor. The shade is a slight off-white, I do not consider it cream like some reviewers. The bottom of the lamp is open and the glass has a slight ripple texture to it.

  • A Dog Birthday Cake Recipe for Your Best Friend!

    A Dog Birthday Cake Recipe for Your Best Friend!

    My dog’s 10th birthday – she was a little confused!

    Dog owners out there, this post is for you! Our dog recently celebrated her 10th birthday and my kids wanted to do something special, she is their best friend after all. After thinking up different places we could take her we decided, because it was a cold and rainy day, we would make her a small cake and party hat as a way to celebrate. My daughter’s quickly went to work decorating a piece of paper to make a hat worthy of their superdog while I went to work baking.

    Well, not right away. First I had to scour the internet for a cake recipe that was both healthy for my dog and only used ingredients I already had at home. That is when I found this recipe at a blog called Spoonful of Sugar Free, which has some pretty good human recipes as well.It had everything I was looking for. Specifically, this cake only has 4 ingredients (egg, apples, peanut butter and baking powder), all of which my dog likes and can eat. The cake bakes easily in 20 minutes, and because I didn’t have a small cake pan, I used a piece of tinfoil that I folded into the shape of a circle.

    As I got to work baking I realized the only thing missing to make this cake complete was the frosting. The cake recipe I had found didn’t include frosting so I decided to improvise.

    Simple Dog Cake Frosting Recipe

    Ingredients:
    1/4 cup natural peanut butter
    1/4 cup plain greek yogurt

    Process:
    Really simple, just mix the two ingredients until they are combined and creamy. Store in the refrigerator or use immediately. And that’s it! Once the two ingredients came together it looked like real buttercream frosting!

    My kids cut and taped their decorated paper into the shape of a hat while I frosted the finished cake and tada! A celebration fit for an amazing dog.

  • Carolyn’s Favorite Protein Bar Recipe

    Carolyn’s Favorite Protein Bar Recipe

    I used to have the hardest time finding a breakfast that not only kept me full until lunch, but also was something I was willing to eat every day. I don’t love a savory breakfast, don’t ask me why because I LOVE eggs for dinner, so I was mostly choosing to eat oatmeal in different variations until that got boring.

    Throughout my research over the years trying to find this mystery meal, I started to incorporate protein powder into my breakfasts. I found a recipe for a homemade protein bar and tried it out. While that first protein bar wasn’t a home run, I changed the recipe a little here and there over the years to make it what it is today – my favorite breakfast that I actually crave. These bars are not too sweet (but still chocolatey), actually keep me full, and are exactly what I am looking for in the morning. Please remember that I am not a nutritionist and this is not medical advice, just my opinion & a homemade recipe.

    Carolyn’s Favorite Protein Bars

    This recipe makes 9 bars

    Ingredients
    9 Scoops Orgain Organic Plant Based Protein Powder – Chocolate
    1 cup oats
    1 cup high fiber cereal – I used Kashi Go Lean
    1/2 cup almonds
    3 Tablespoons chia seeds
    5 Tablespoons mini chocolate chips
    4 LEVEL Tablespoons natural peanut butter
    1 – 2 cups water

    Process
    Mix all the dry ingredients together so they are evenly distributed. Add the peanut butter and 1 cup water. Start mixing making sure to spread the peanut butter evenly among the rest of the batter. Slowly add more water a few tablespoons at a time and mix until there is no dry protein powder left. You may not use an entire 2nd cup of water, the amount of water you use will change depending on slight variations of dry ingredients. The batter will be VERY thick and should not be too watery. I usually have to push and smear the peanut butter a little to help distribute it.

    Spray an 8×8 or 9×9 baking dish or pan with non-stick spray. Press all of the batter into the dish compacting it down and leveling the top. Cover and put in the refrigerator for at least 6 hours, preferably overnight. Once solid, cut into 9 equal pieces and enjoy! Keep refrigerated.

    Variations: You can change a lot in this recipe such as using walnuts or pecans for your nuts, almond butter instead of peanut butter or a different cereal or protein powder flavor. If you don’t like the flavor at first, add more or less of what you like or don’t like!

    After doing the math I came up with the following approximate nutritional figures per bar based only on the recipe as written above:

    Calories – 267
    Protein – 25.7g
    Fiber – 8.27g

  • Today I need a … Protein Powder

    Today I need a … Protein Powder

    This week’s Today I Need A… post is all about protein powder. Specifically our favorite powder, Orgain Organic Plant Based Protein. Let’s talk about how we use it and why we love it. Before we start I need to let you know we are not nutritionists or doctors, this is only our opinion and not medical advice.

    Why do we use protein powder in the first place?
    Carolyn – I wanted to up my protein intake to help keep me fuller for longer periods throughout the day and to add a little extra support after my strength training workouts. I used to get hungry within an hour of breakfast if I chose to eat something that wasn’t high in both protein and fiber. Now, I make homemade protein bars that keep me full until lunch, I make shakes as afternoon snacks and add it to pancakes, muffins or anything else to add a little bit of extra organic plant-based protein to my recipes.

    Nanette – Life is busy!! Getting enough protein during the day can be very difficult in our house, especially on hectic days. A bit of protein powder can get me through the morning – I’m not a big fan of breakfast as I don’t get hungry until later in the day. When the girls get home from school and need a snack to keep them from getting hangry before dinner (which can happen a lot) – I’ll just whip up a shake. They love concocting new crazy recipes. My husband uses protein powder before his workouts, especially before he jumps on the treadmill.

    What protein powder do we use?
    We both use the Orgain line of protein powders on a daily basis.
    Orgain Chocolate Fudge – Carolyn’s Favorite but Vanilla and Peanut Butter are also available.
    Orgain Protein & Greens Powder – Great way to give you or your kids an extra serving of green vegetables! Choose Chocolate (Nanette’s Favorite) or Vanilla.
    Orgain Clean Whey – If you prefer an animal based whey protein. We haven’t tried this version.

    Why we love it:
    Organic plant-based protein. Nanette and I both make a commitment to our health, as well as the health of our families, and we both strive to eat more organic foods and vegetables.

    -Protein + Fiber in one. For those of you who are like me (Carolyn) and are constantly hungry, I find the combination of protein and fiber to be more satisfying and allows me to go a little longer without getting hungry between meals.

    -Makes getting our daily intake of veggies easy!
    With Orgain Protein & Greens Powder I can get my kids as well as myself to eat more veggies without really knowing it because it contains spinach, kale and broccoli in the powder! While I do taste a bit of the veggies, it’s tolerable to me, my kids don’t notice it when they also taste the chocolate and if I am just drinking the protein plain with milk I can always add some powder from the chocolate fudge flavor to help with the slight veggie taste.

    How do we use it?
    Carolyn – Each week I make a batch of homemade protein bars which I eat for breakfast almost every day. I include other healthy ingredients such as almonds, chia seeds and oats to get my day started on a positive note. I also make a modified version of protein bars and sometimes granola bars for my kids which they love! I love that they are getting some veggies in and they don’t seem to notice. Recipe for my homemade protein bars coming soon!

    My homemade protein bar – LOVE it! Might not be pretty, but I am hooked.

    Nanette – Lately we have been obsessed with shakes in our house. My daughters’ pediatrician always reminds them to “eat their colors”, I love this saying! It means to eat different colors of vegetables and fruits everyday. If you have only eaten red (apple) today then you need to add some orange (carrots) and green (spinach). Shakes are really good way to do this and adding the Orgain Protein & Greens Powder helps them get their greens. We blend the vanilla with all different types of fruit like raspberries, blueberries and strawberries. Their FAVORITE recipe is Peanut Butter Patty: just mix Chocolate Orgain with peanut butter, banana and unsweetened almond milk. It really tastes like the Girl Scout cookie!

    *affiliate links

  • The Most Versatile Pillow Covers on Amazon

    The Most Versatile Pillow Covers on Amazon

    I use these pillow covers all year round! The versatile plaid pattern can fit pretty much anywhere in your house. I have these covers in black and white and also mix them with pumpkin pillows in the fall and snowflake pillows in the winter. This month, pair them with an Easter pillow for a Spring Farmhouse look or place one on a dining room chair for a pop of color and comfort. Remember- they are just covers, you need your own pillow forms.

    Find them here on Amazon!

    *affiliate links

  • Mrs. Meyers Soy Candles

    Mrs. Meyers Soy Candles

    Check out these Mrs. Meyers Lemon Verbena Soy Candles, they smell like heaven. Sometimes Amazon will run a deal that makes them less than $6 a piece! Find them here.

    *affiliate links

  • Today I need a… standing desk

    Today I need a… standing desk

    This weeks Today I need a… post focuses on Standing Desks. When I started working from home I ran into some issues related to staying active while not really leaving the house. I take my kids to school in the morning, but unless I have errands to run I am at home on my computer working, mostly sitting. One of the first decisions I made to help me feel like I was doing something healthier was to buy a standing desk. Below I outline my criteria and research process for how I made my decision on the desk I ultimately bought.

    1. I knew I wanted something that would fit on top of my desk and not a new desk altogether. This is because I am extremely lucky to have a large desk that fits two chairs and spans the wall of my home office thanks to my extra handy father-in-law. I love my desk. I especially love having so much desktop space to work with and didn’t want to add more large furniture to my house. This helped me narrow down my search to desktop versions of what I was looking for.

    2. I also wanted something that was a flat surface. I use a laptop, mouse and sometimes an extra monitor for most of my work. This meant that I didn’t want a desk with a separate, sometimes lower, keyboard section. I wanted it to be large enough to fit my laptop while also having room for me to draw/write in my notebook for taking notes and sketching ideas.

    3. Finally, I wanted something adjustable that I could use either for sitting or standing. Let’s face it, I don’t want to stand all day long. While wanting to be healthy I also know that there are some days I am just plain tired. I looked for something that was easy to adjust at a moments notice.

    After looking at a number of stores the desk I eventually chose I found on Amazon. Called Innovadesk Adjust Standing Desk Converter, I can say I love this desk. It moves smoothly up and down and gives me enough space to hold my items necessary for work. Obviously, the weight of raising and lowering will change depending on how much you have on the desk. It was definitely heavier when I had a monitor on it compared to just my laptop, but not enough that I couldn’t use it.

    You can find this desk here on Amazon.

    This is the desk in the raised position. Very easy to raise and lower.

    *Please ignore my super plain office, it is on my list to get a makeover and will be part of a later post!

    This is the handle you squeeze to raise and lower the desk. There is a small cutout on the desktop surface to make room for this handle, but it doesn’t bother me.

    Additional notes: Because this desk will not be the same height as your regular desk be aware that you may have to raise your desk chair or add a cushion in order to raise yourself when seated to the best ergonomic height for seating comfort.

    If you are looking into doing your own research you may need to look under different names such as desktop converter, adjustable desk, desk riser, and/or standing desk.

    If you are looking for a new desk altogether there are a number of desks where the entire desktop raises and lowers. With this option you will see a higher price for a larger piece of furniture.

    This is where I’m going to chime in! While I don’t have a standing desk at home I’ve been working for an office furniture company for over 10 years and have experience using many different models. There are numerous places to buy a standing desk but I will use examples from Office Designs first since I’m familiar with their product line. Their curated selection of height adjustable options can be seen here: https://officedesigns.com/our-products/shop-by-category/height-adjustable

    My top recommendation from these items would be Herman Miller’s Renew Sit-to-Stand. The price for a 48” x 24” desk with laminate top begins at $1545 which may seem a little pricey but it includes Herman Miller’s 12-year, three-shift manufacturers’ warranty. When purchasing a desk with moving part you want to be certain you won’t be stuck with a “plain” desk after the motor dies in 5 years. Herman Miller builds gorgeous high-quality products that last a lifetime. This desk is no exception it has style and works flawlessly.

    If you are not ready to invest and need a full height adjustable option there are some available on Amazon. When browsing online for a cheaper model I wouldn’t discount hand cranked options, you may find they will last longer than one that relies on a motor such as this one.

    A mid-range option would be an entry level model from Uplift Desk. You can design your own model here or shop their pre-configured models here. The have a 60″ x 30″ black laminate option for, it comes with free shipping and a 7-year warranty. This company specializes in Height Adjustable Desks and would be a good place to start your journey.

    *affiliate links

  • Shout-Out to Hydro Flask

    Shout-Out to Hydro Flask

    This week’s shout-out goes to my favorite water bottle … the Hydro Flask! I don’t go anywhere without this bottle, it helps me stay hydrated while preventing me from spilling my drink all over my computer, car, counter top or children – one could say I’m a bit clumsy. More importantly it keeps my cold water COLD for 24hrs.

    Yes, this is one of THOSE water bottles that keeps hot liquids hot and cold liquids cold. I’ll put ice and water in mine at night, stash it on my nightstand (actually two plastic bins ~ we just moved) and in the morning it’s still cold.

    Things to note:

    • The outer coating prevents sweating
    • Available in different sizes with different cap options
    • They now have a Mug version for coffee, I use it everyday
    • Slow beer drinkers can worry no longer
    • Doesn’t taste like metal – my biggest complaint when it comes to stainless steel water bottles.

    Special tip:
    Once a month I let them soak filled with water and some white vinegar. This works especially well if you have been using yours for coffee.

    Our Picks:

    My favorite: 21oz. w/ sports cap

    For the kiddos: 12 oz. Sippy cup version

    Add this cap if stashing in backpack or traveling

    Coffee mug – keep that coffee hot

    Pint glass – yummy cold beer or virgin daiquiri

    *affiliate links