Well, it’s here – the Summer Causebox! I was so excited to get my Summer Causebox and unwrap all the goodies because I loved the Spring box so much, I just knew this one would be a home run. And boy is it. I am in love with all the products this season has to offer. Let’s take a look at what I received! (P.S. – this makes a perfect gift for someone special!)
Summer 2019 Cause Box
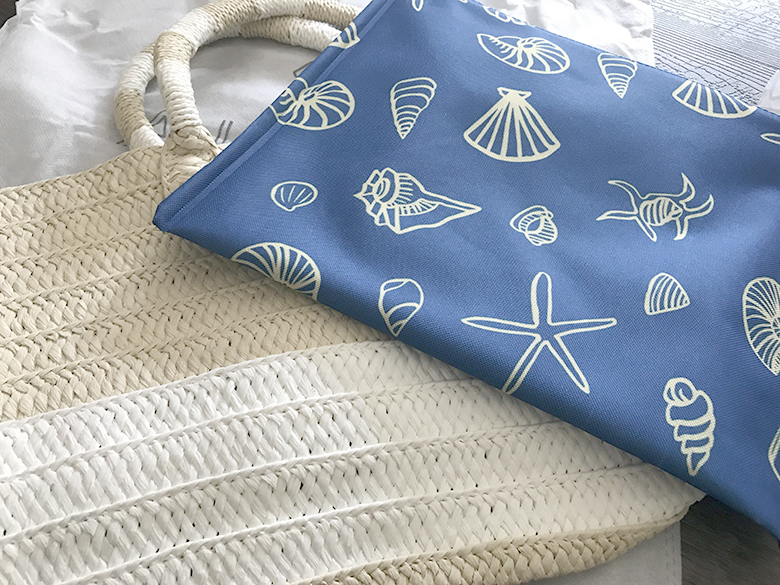
There is seriously so much goodness in this box. Just the Caftan and Straw Tote alone would easily add up to $50*, but you get so much more!
* If you purchase the monthly subscription the price is $54.95 per box, if you decide on an annual subscription you save $5 making each box only $49.95 and you get to customize some of the items.
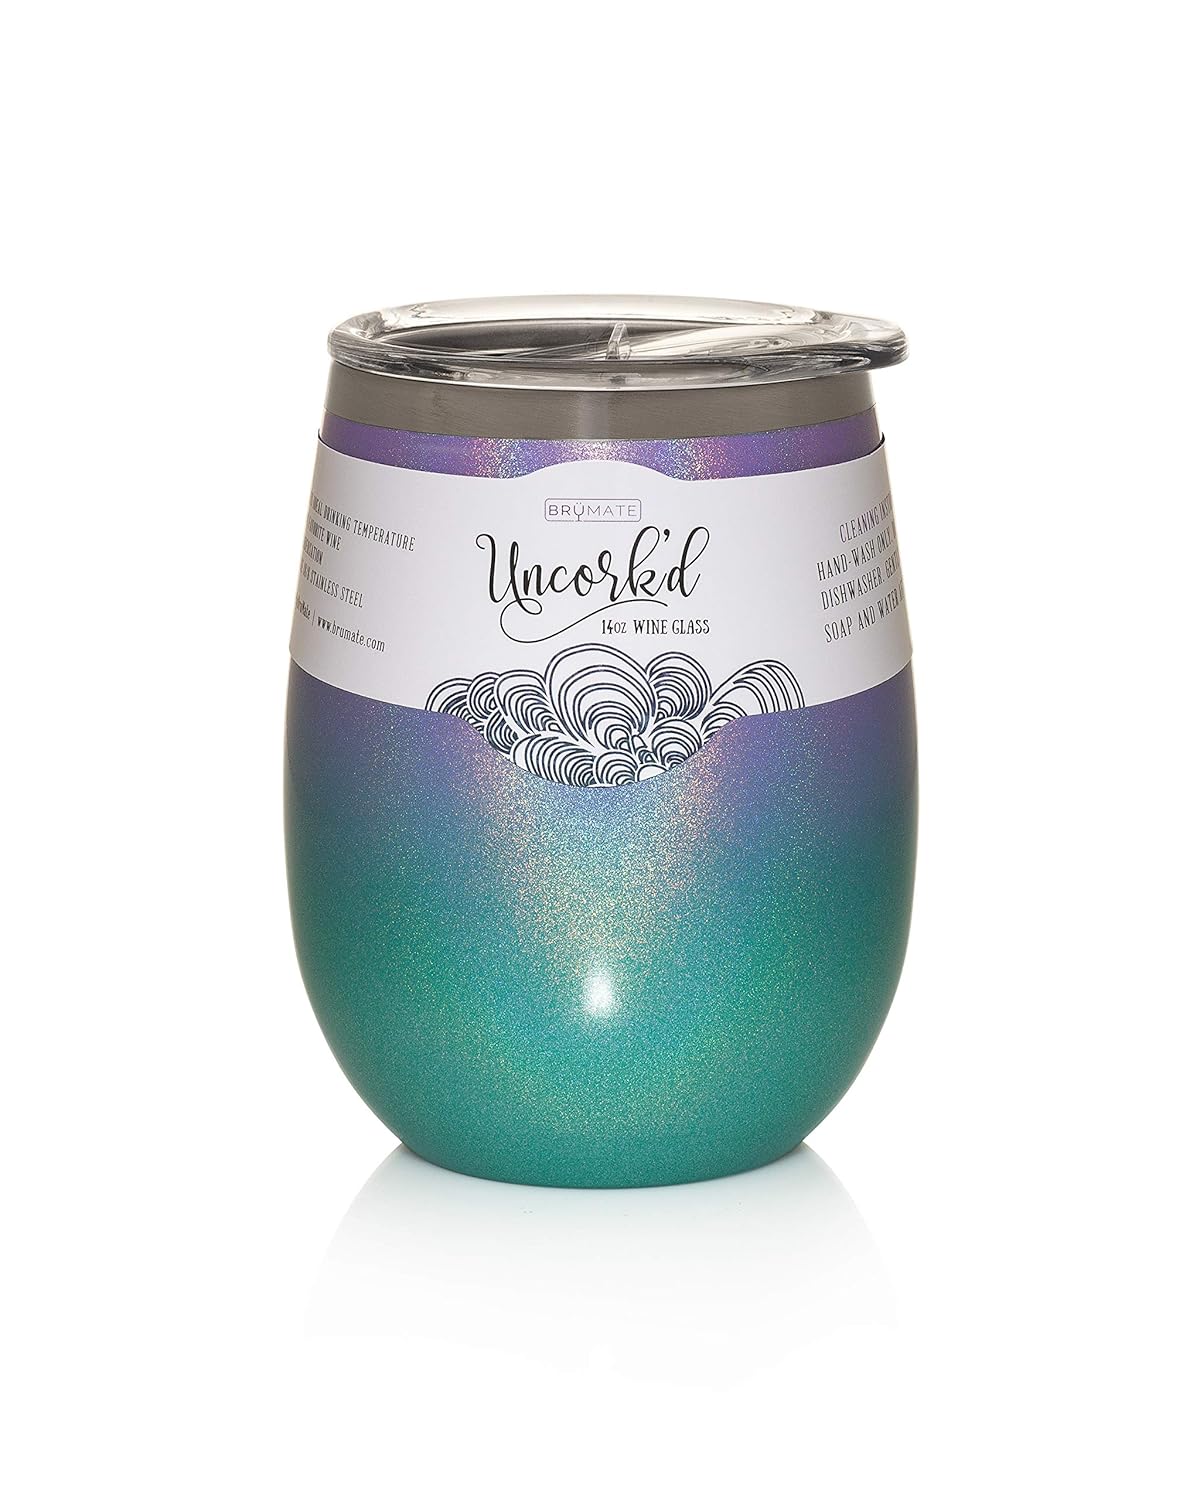
Reduce Insulated Wine Tumbler – Perfect for outdoor parties
Island Aloe Gel – Instant healing for sun-kissed skin (or sunburned)
Straw Tote Bag – Fun summer accessory.
Wet Swim Pouch – Definitely bringing this on my upcoming vacation.
Banded Scrunchies – Everything comes back in style including scrunchies!
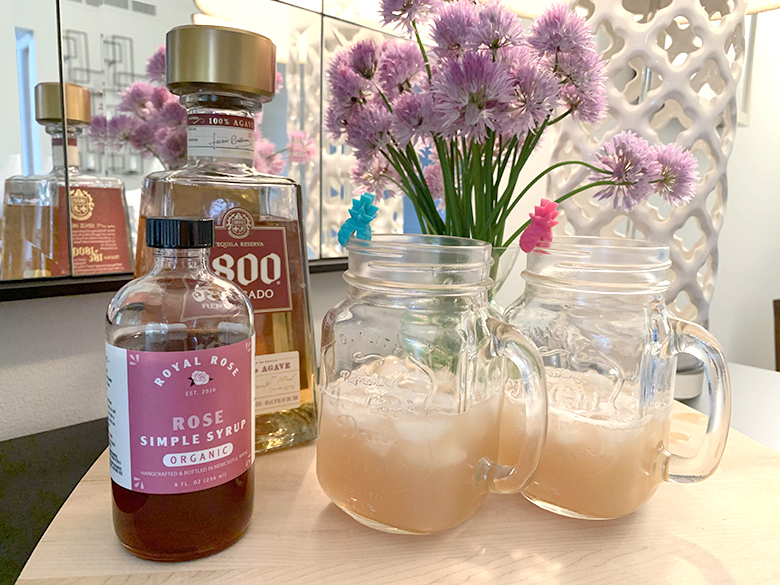
I love a good Rose Margarita Recipe, especially during the summer. I always make my own simple syrup mainly because I don’t love all the added ingredients in pre-made, bottled margaritas. Also, I usually only want one drink and don’t want to tempt myself with an almost full bottle every time I open the fridge. So when I found this line of Organic Simple Syrups from Royal Rose I knew I had to try them out.
I was really intrigued by their Rose Simple Syrup and wanted to give it a try. So this weekend I tried out a margarita recipe and boy am I so glad I did. I mixed Royal Rose’s Rose Simple Syrup (say that three times fast), tequila and lime juice. That’s it. It was delicious with a slight floral hint for a little twist on a standard margarita. You can get the Rose Simple Syrup here: Rose Organic Simple Syrup 8 oz.
Right now they are offering 15% off everything with code SYRUP15 at checkout. Check it our here!
Rose Margarita Recipe
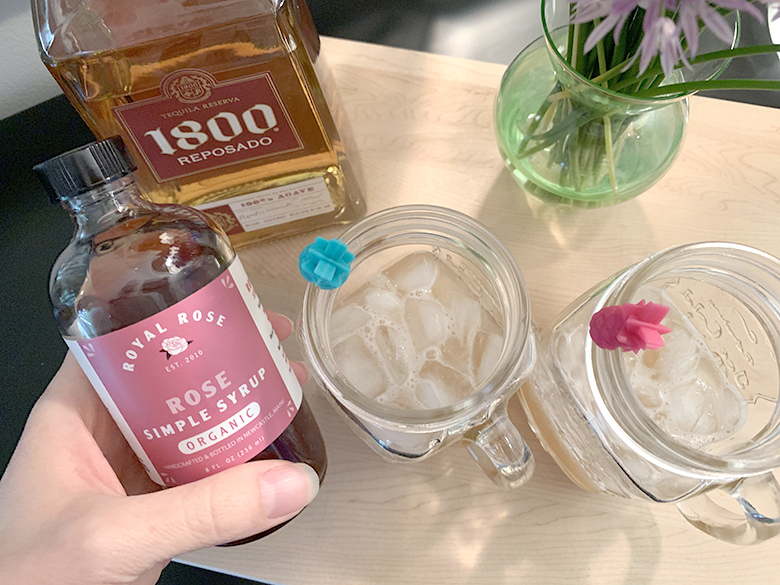
Ingredients: 2 oz tequila 2 oz Royal Rose Simple Syrup – Rose Flavor 2 to 3 Tablespoons Lime Juice (depends on how much lime you like- the more lime juice you add, the less you’ll taste the floral rose)
Method: Combine all ingredients in a cocktail shaker with ice and shake. Pour over ice in your favorite glass and enjoy! If you like a sweeter drink you can add a little more simple syrup or a little less lime juice. This was the perfect combination for me. For a little extra fun, muddle in some chopped strawberries or add dried rose petals if you can find them!
I loved this drink, my husband loved this drink and we will definitely be having more margaritas by the fire in the summer nights to come.
Father’s Day will be here before you know it, so get your gift now! We’ve assembled some of our favorite Father’s Day gift ideas below to help make it easier on a mom who already has a million and two things on her to-do list. Let’s check this one off your list today!
For Dad’s who love technology (and have an iphone) – Apple Watch Series 4 – Although the most expensive item on our list, this watch can do so much including take calls, text, track workouts and more.
For Dad’s who love technology (and have an Android phone) – Samsung Galaxy Watch – With a charge that can last for days, this is a watch that will be his personal assistant. Like the Apple Watch, he can take calls, text, track health, workouts and more.
For the sentimental Dad – Snapfish Woodblock Desk Calendar, on sale through 6/4 for 60% off with code 60M2019 making this calendar just under $10! This calendar is the perfect addition to any Dad’s office or desk, especially when personalized with priceless family pictures.
For Dad’s who love their team – Custom MLB T-Shirt – Give them a shirt you know they’ll love with their own name on the back!
For the Dad who loves his morning coffee – Whiskey & Rum Barrel Aged Coffee Whole Bean Box Set – A special dad deserves special coffee. This gift box has three different samples of coffee you won’t find in your everyday grocery store.
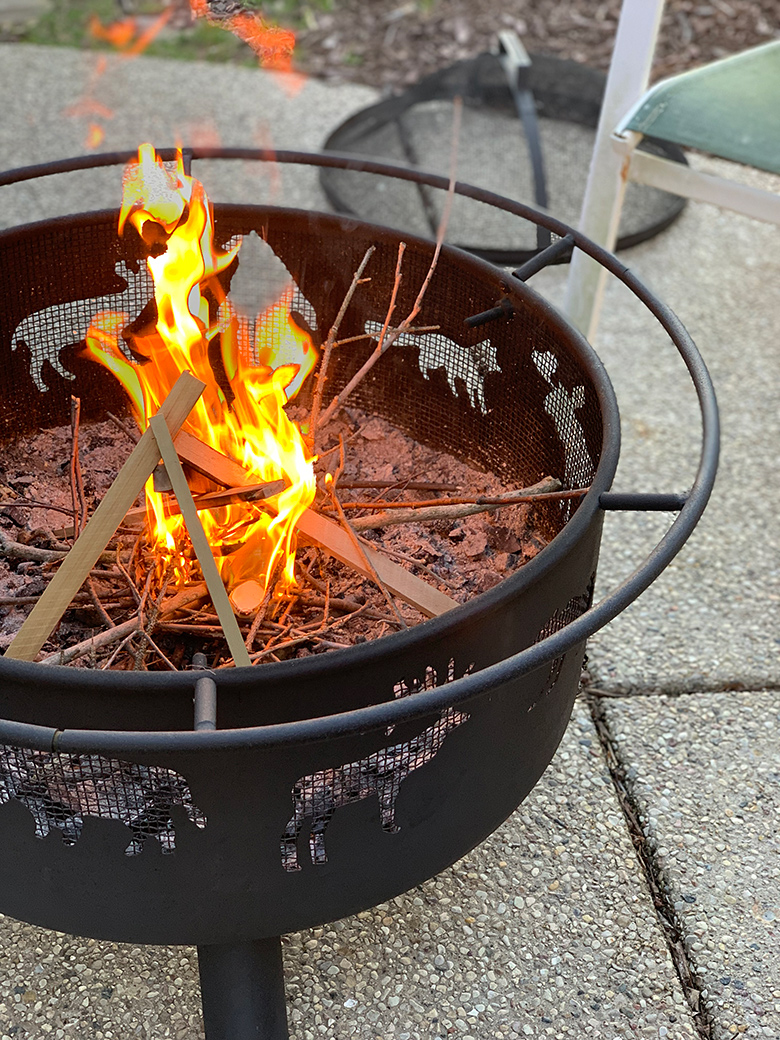
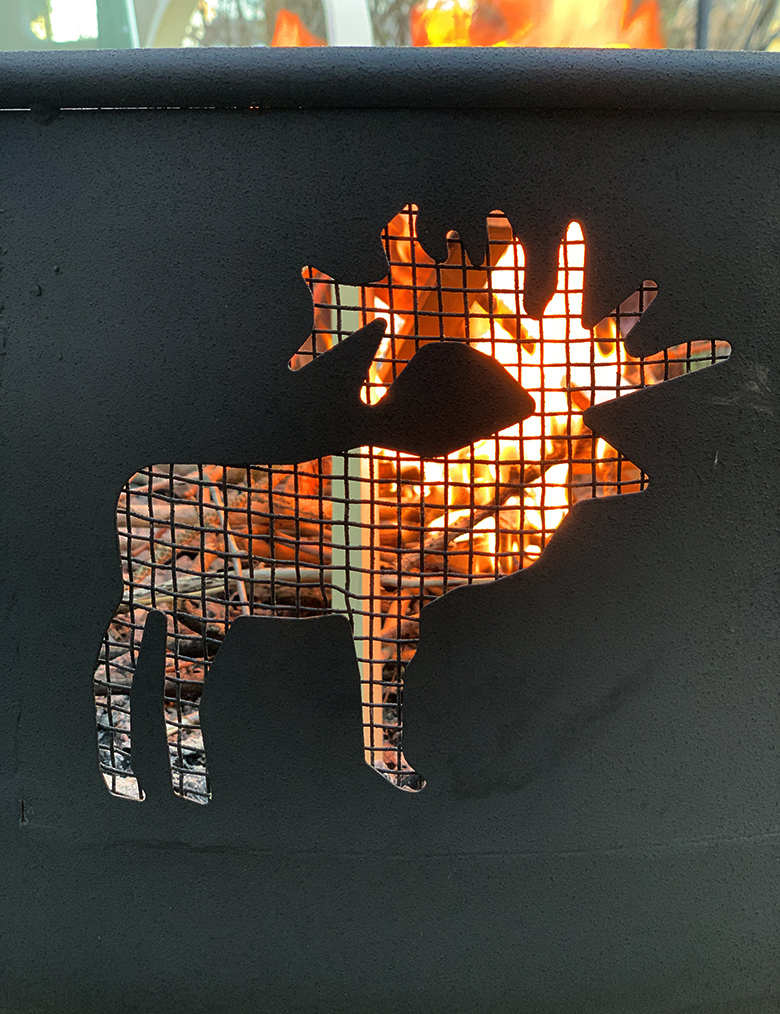
For the Dad who loves being outdoors – Landmann 28347 Big Sky Fire Pit – We’ve reviewed this fire pit before on this blog, I got it for my husband a few years ago for Father’s Day and it was a big hit. Make sure to coat with high-temp rustoleum and it’ll last for years of s’mores and campfire memories.
Hi all! Welp, this spring is not going as planned. Here in Chicagoland we have had a horrible spring: low temps, late season snow, then rain all the time. It has been a rough start to what is supposed to be a better weather season than winter. Usually, at this point into the spring, our family has enjoyed many nights by the fire before the mosquitoes get too bad in the thick of summer.
Our entire family loves spending time around the fire pit. We all take a break from screens and just enjoy each others company telling stories and making s’mores. This weekend we also want to try an outdoor movie, I’ll let you know how that goes!
A few years back we were in the market for a new fire pit. Our old pit did not stand the test of time, it was really pretty with mosaic tile around the outside but the tile started cracking and falling apart after the first season of use. So, as I always do, I researched online for a new fire pit that we could use for years to come and landed on this beauty – the Landmann Big Sky Fire Pit.
Disregard the weird fake-looking fire, I’m not sure why my phone took this picture like that.
I ended up getting it for Father’s Day for the hubby from my girls. It comes in a few styles and the girls both picked the one with the animal cut-outs on the sides.
Boy, have we loved this thing. Let me give you the details on how we help make it last because if you don’t take care of it, it will rust.
First, as some reviewers suggested, we sprayed the entire pit with High Heat Rustoleum right after we assembled.
Then we added sand and a layer of fire safe bricks.
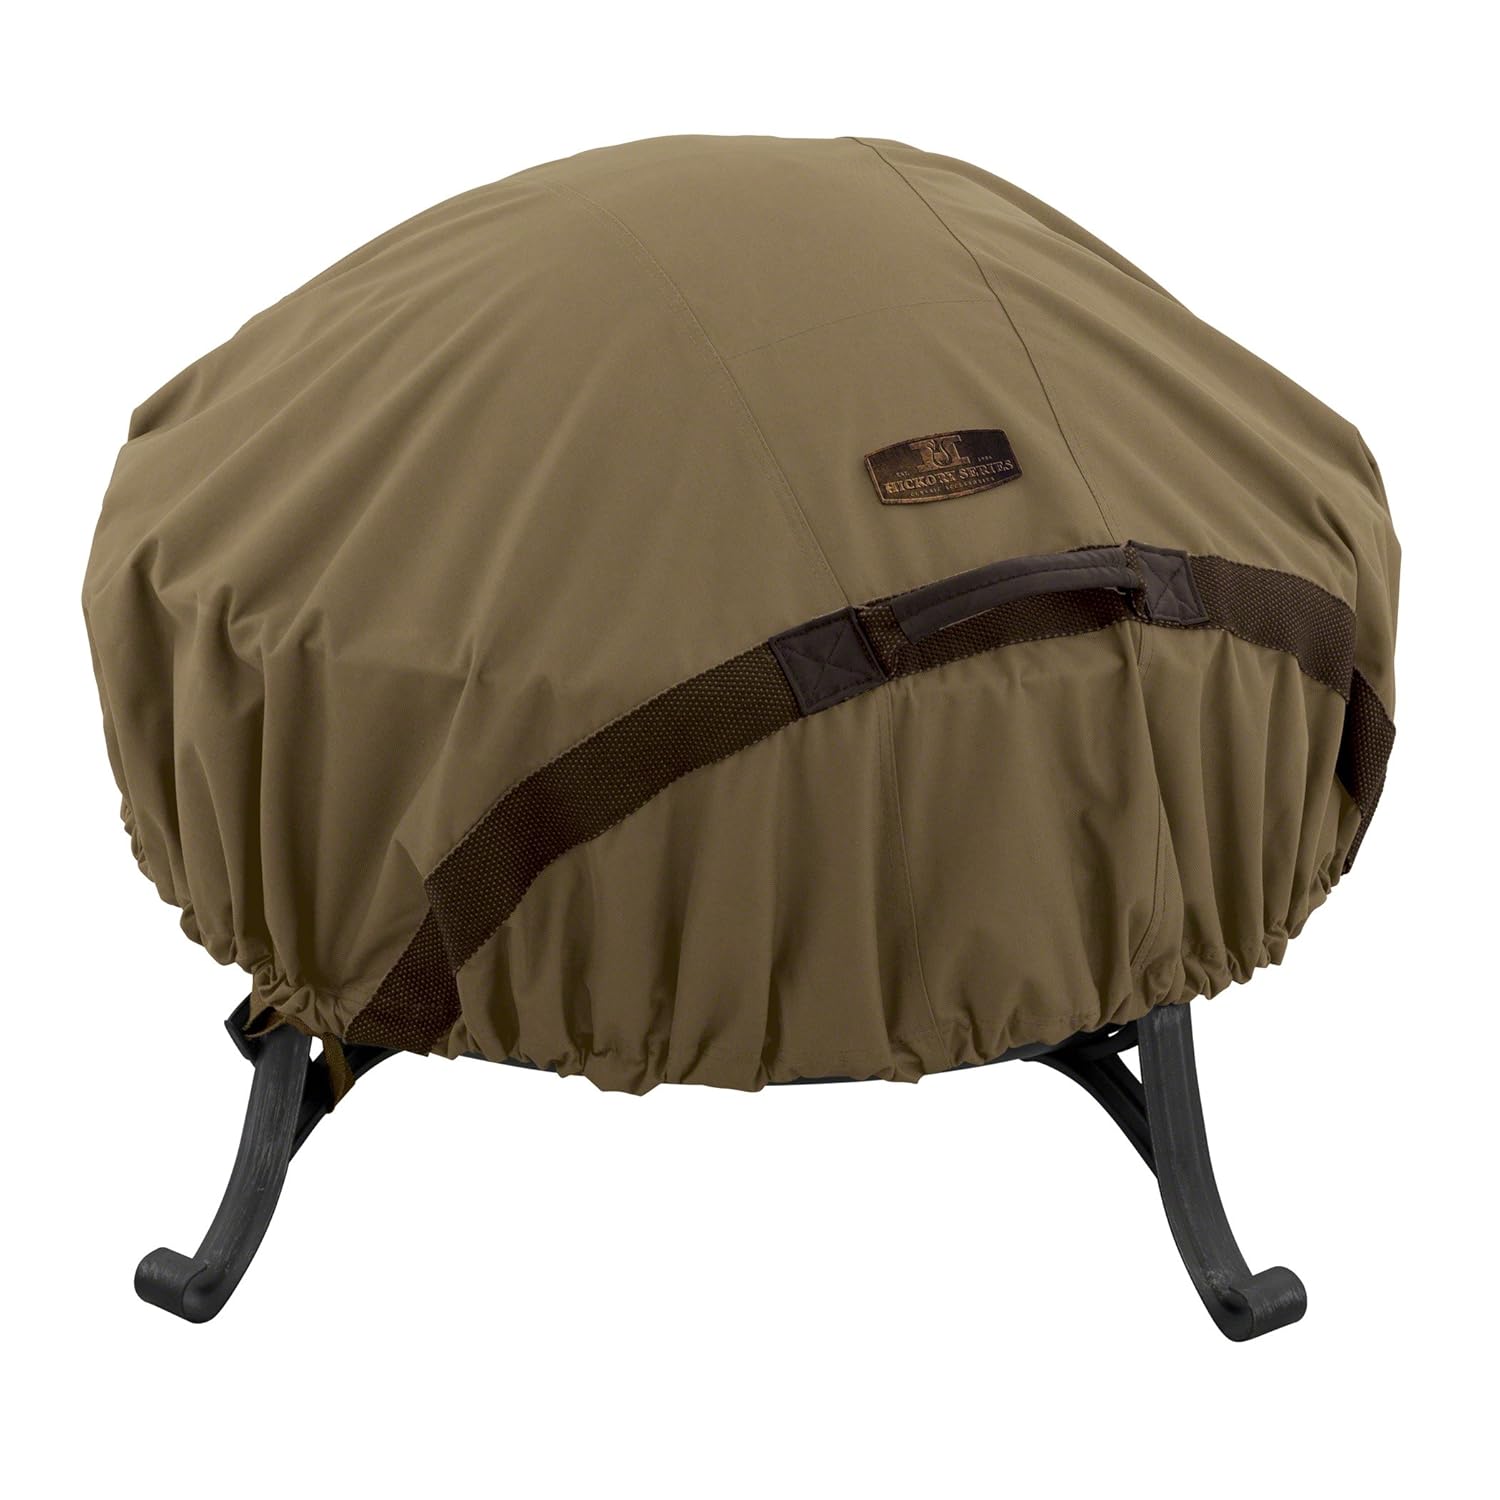
I also always cover it. I don’t want it to rust or to gather water from the rain and then have to scoop out ashy water. This is the cover we bought for it, it’s a bit big but does the job and has held up through 2 summers and winters with lots of rain and snow.
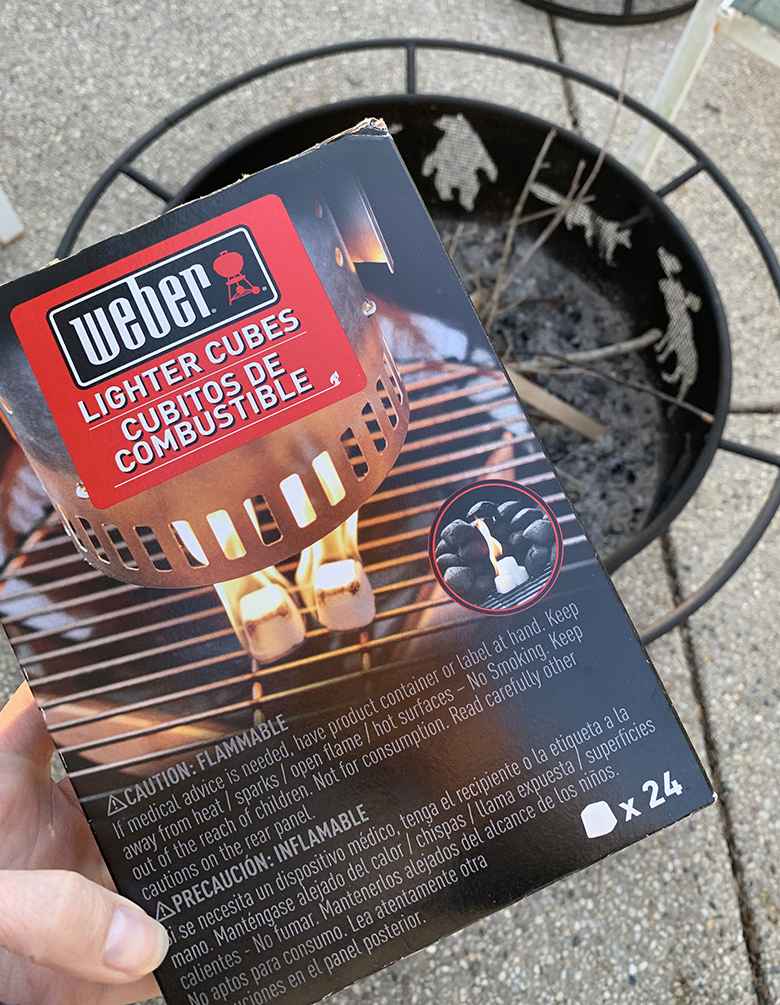
Finally, I thought I would also tell you about these amazing Lighter Cubes we use from Weber. These make starting a fire so, so easy. I literally only need one or two cubes. I place them underneath some of the wood then light them with a lighter, they light fast and easily.
I couldn’t stop drooling over Carolyn’s Cast Iron Pizza Recipe and knew I had to try it. We are obsessed with pizza in our house. Every Friday night is Pizza & Movie Night. It is an open invitation for family and friends to drop by for some pizza, a beer and a family friendly movie. Last Friday we watched “Get a Clue” the 90’s movie based on the book “The Westing Game”. It was VERY 90’s!
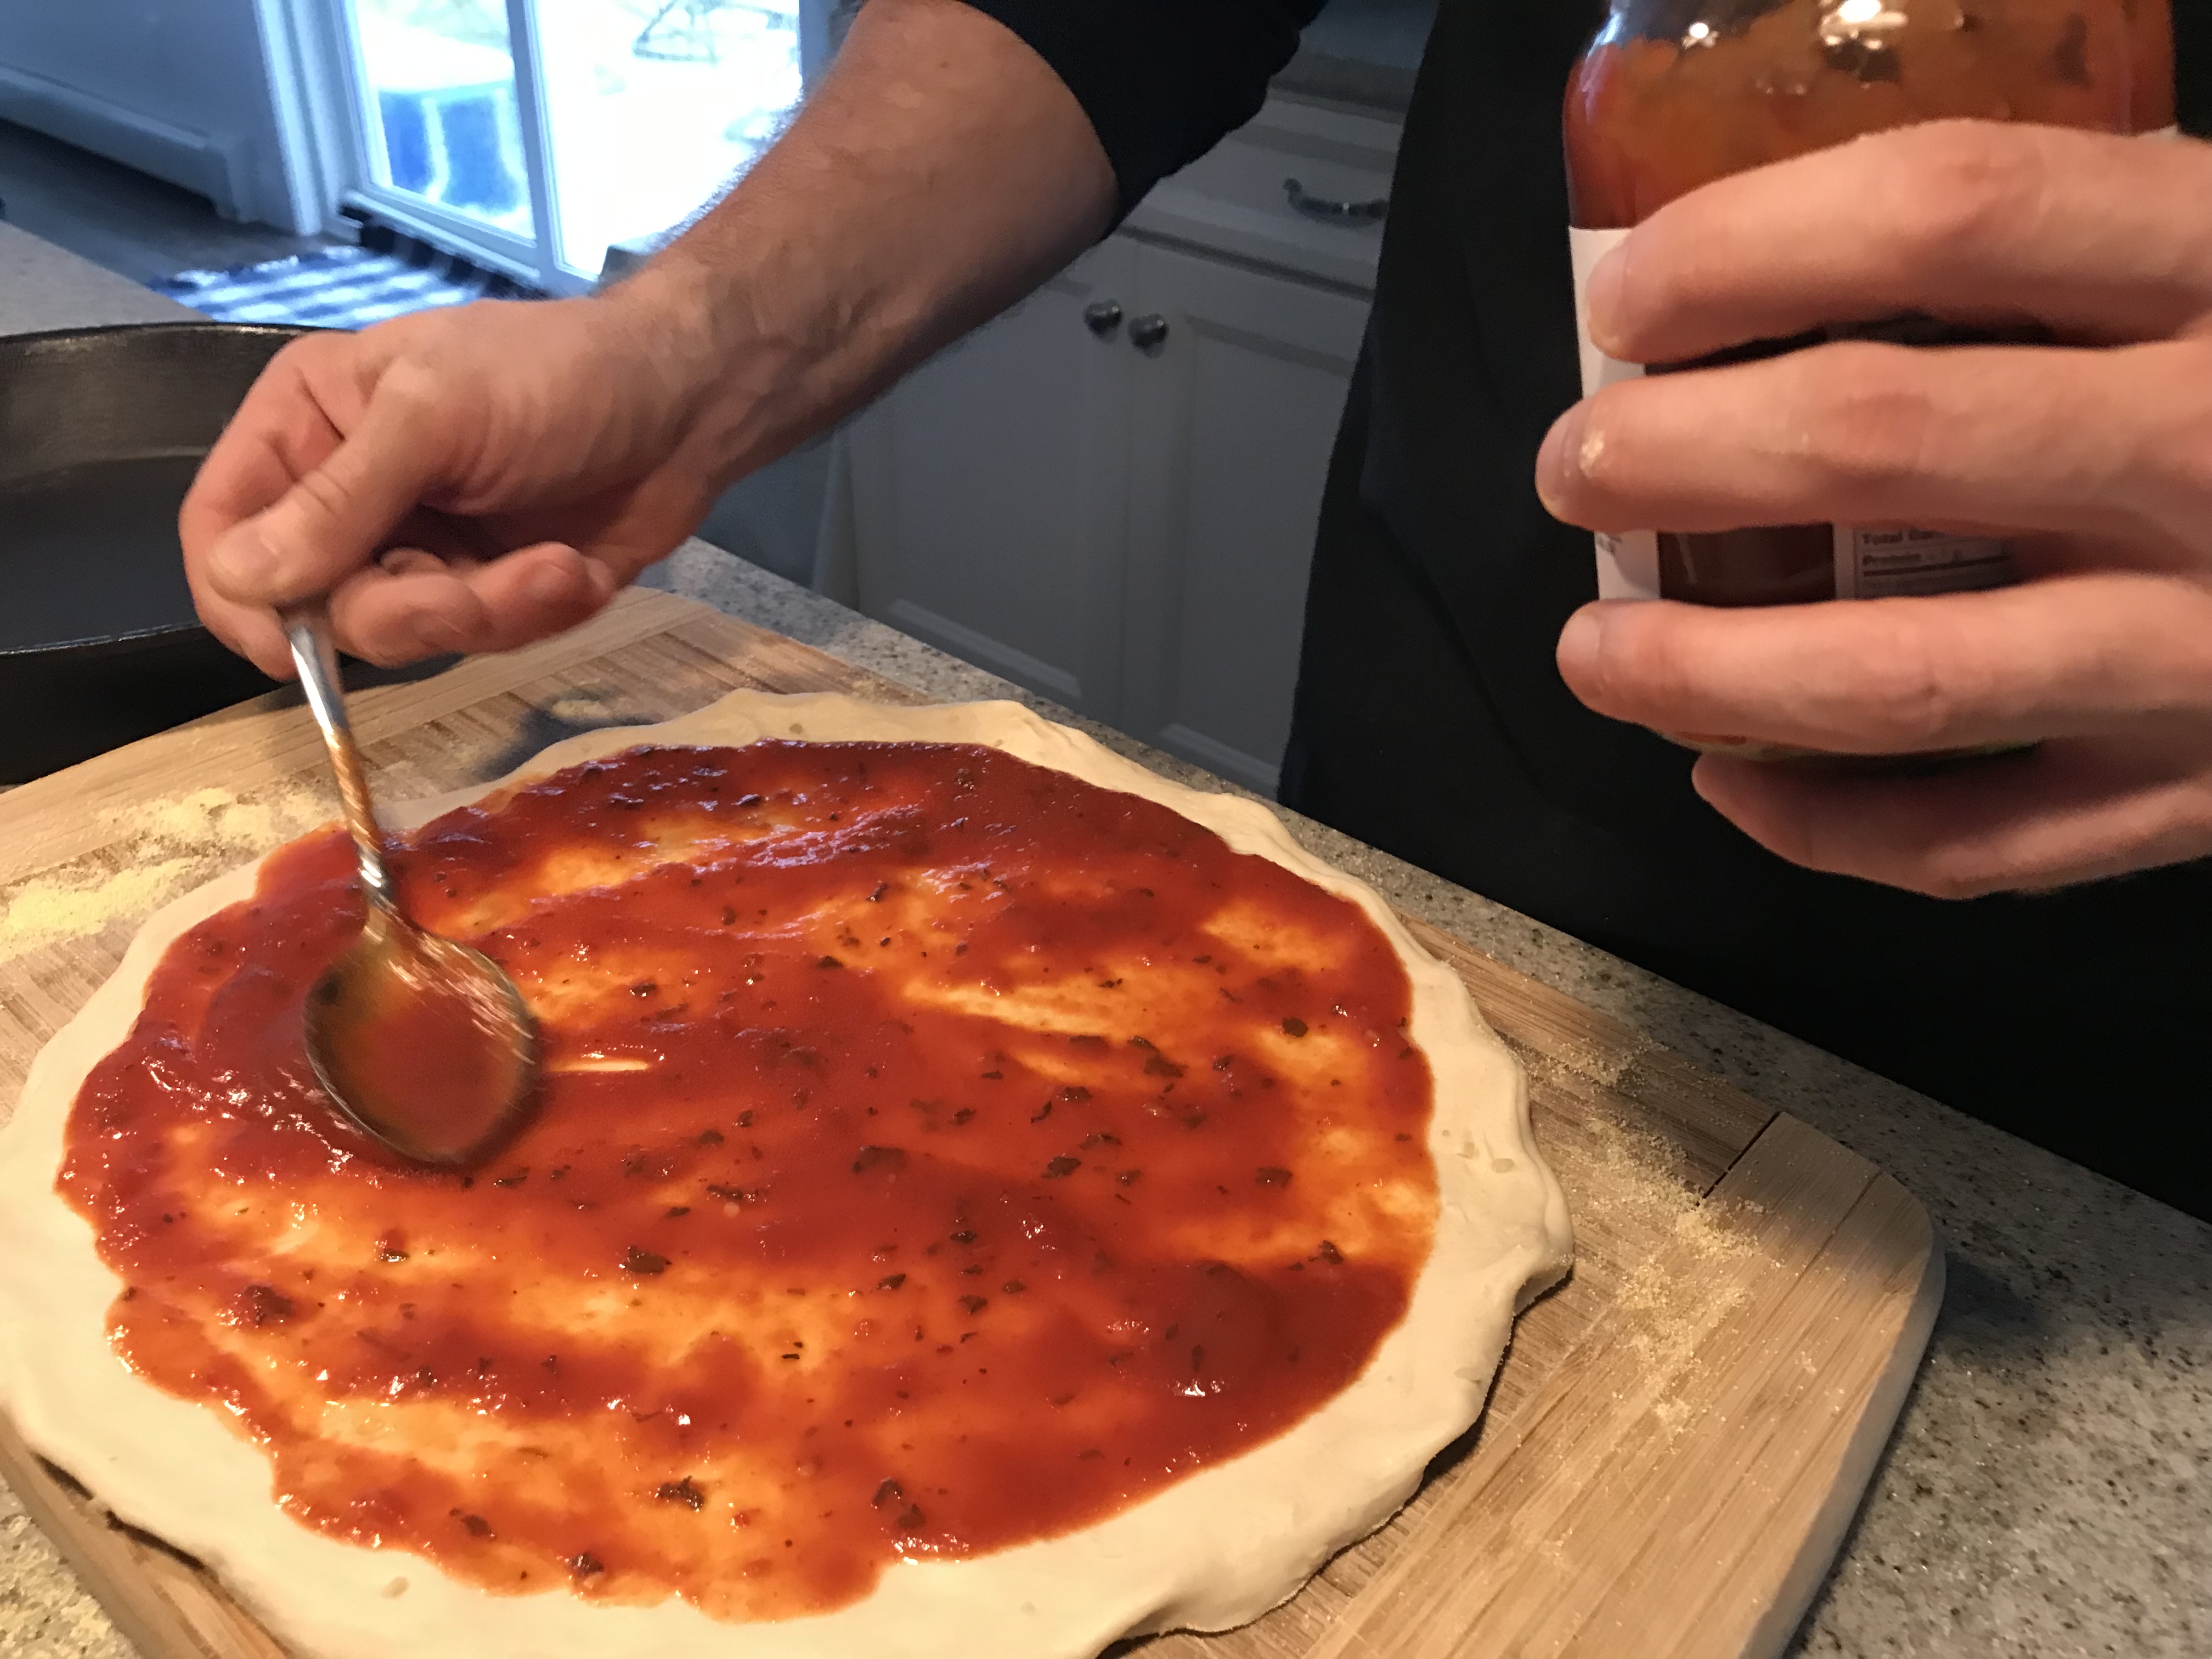
We tried our own “easy” version and were blown away by how much it tasted like a brick oven pizza! Carolyn has always been more skilled in the culinary arts – my cooking skills are fairly basic and I am so proud that I didn’t screw this up! We followed her directions, placed the topped pizza onto a piping hot cast iron skillet for a minute, then put it under the broiler set on high. All I can say is wow, this is how I am making pizza from now on. Crispy on the bottom, bubbly on the top, and delicious.
This is our Easy East Coast Version which doesn’t really have a recipe. We rolled pre-made pizza dough from Portland Pie Company, spread pizza sauce from Bove’s, a Vermont company, on top and then added our favorite mix of pepperoni and black olives. Be creative with your toppings, use what you love! We used our Old Mountain cast iron skillet purchased at Reny’s, if you are not from Maine you can also find them on Amazon: https://amzn.to/2Wdq6F7.
And that’s it! Simple, fast and super delicious.
Needed to include this picture of my new ‘Vintage 1979’ stemless wine glass; a present from Carolyn and Jennifer for my 40th birthday. Gift ideas for milestone birthdays post coming soon!
My go-to baby shower gift for a new mom is 75% practical items (for baby) and 25% indulgence items (for mom).
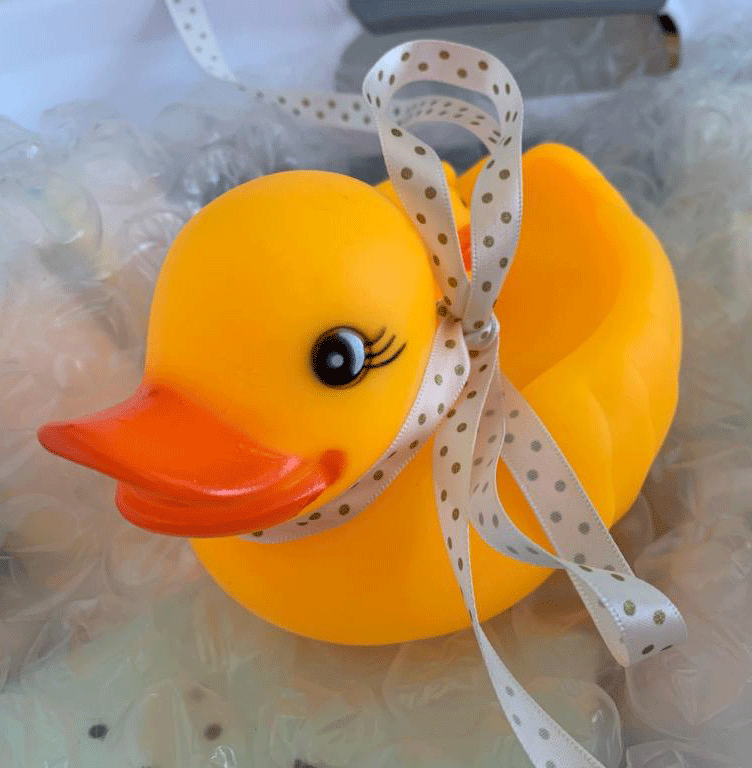
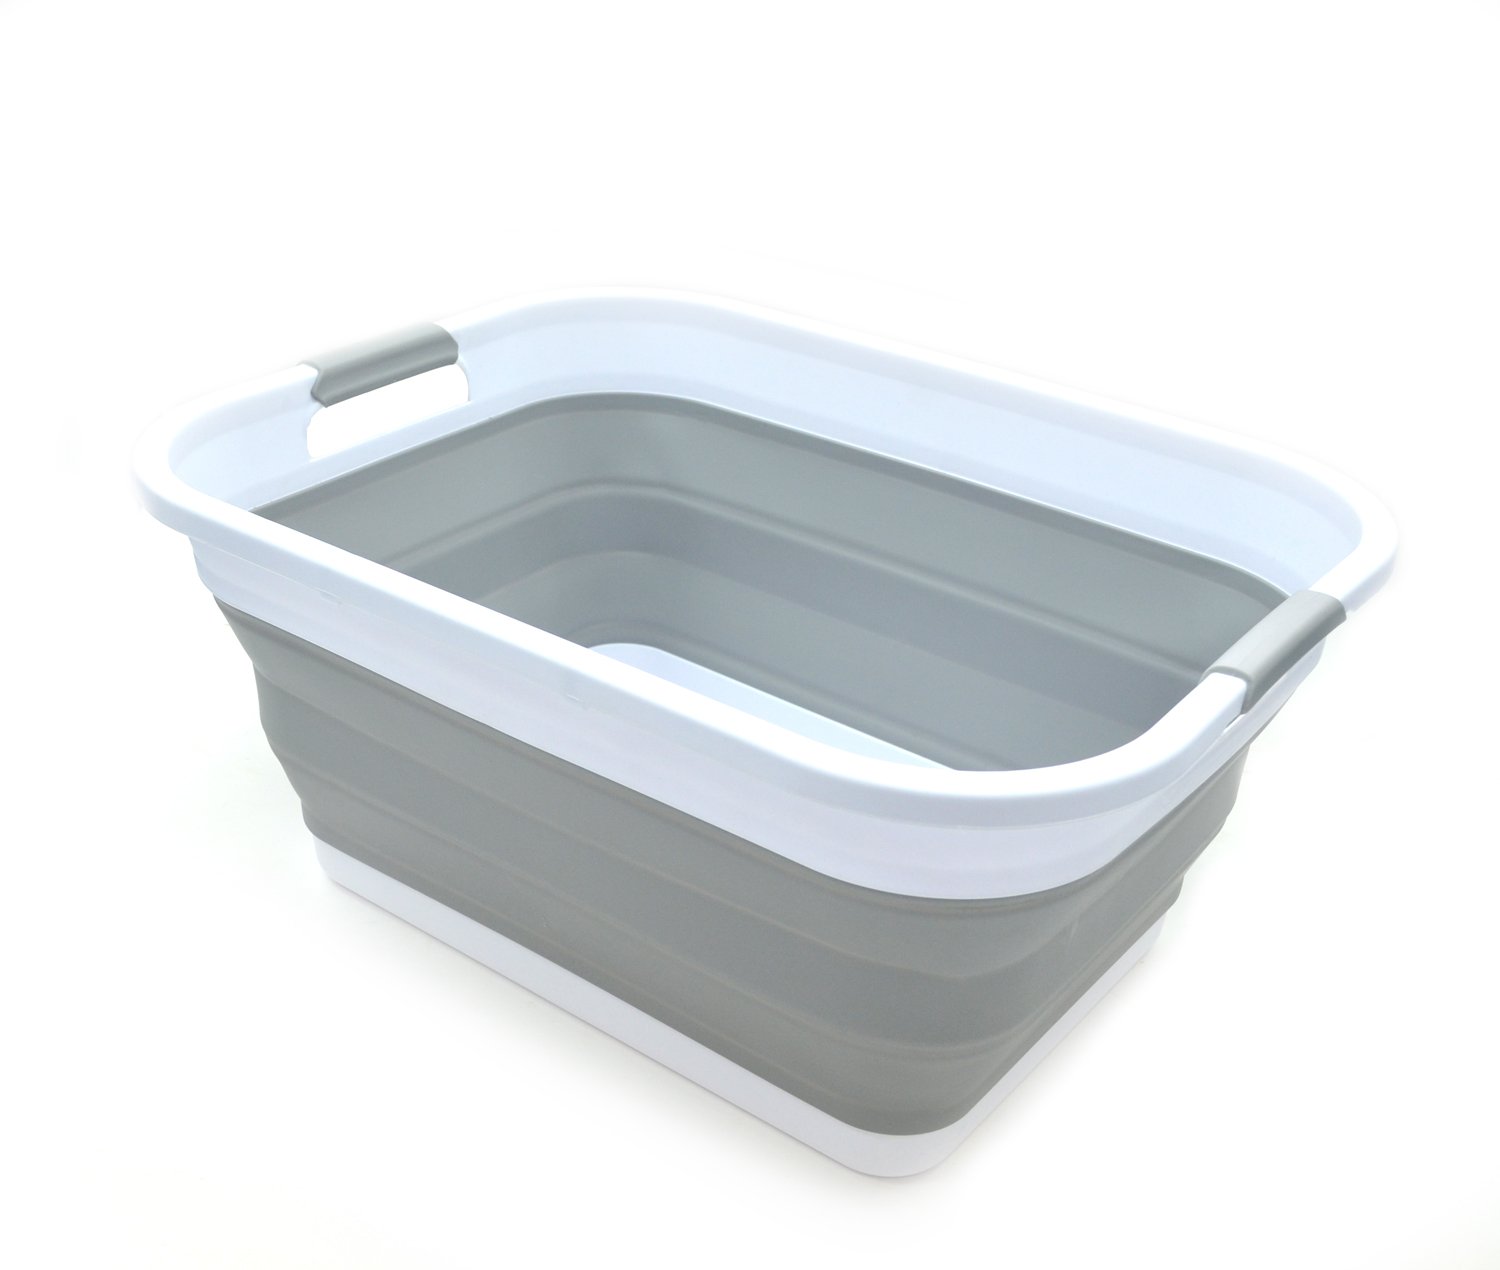
For this particular gift, I started with a collapsible laundry basket because, let’s be honest, there will be lots of laundry to do after the baby arrives! I filled the bottom with different sized diapers and a few packages of wipes. Then, I added some super-cute bibs, pacifiers and a little something for the mom post-baby. To complete the bathtub look, I laid some large bubble wrap (get it – “bubbles”) over everything and topped it all with rubber duck toys!
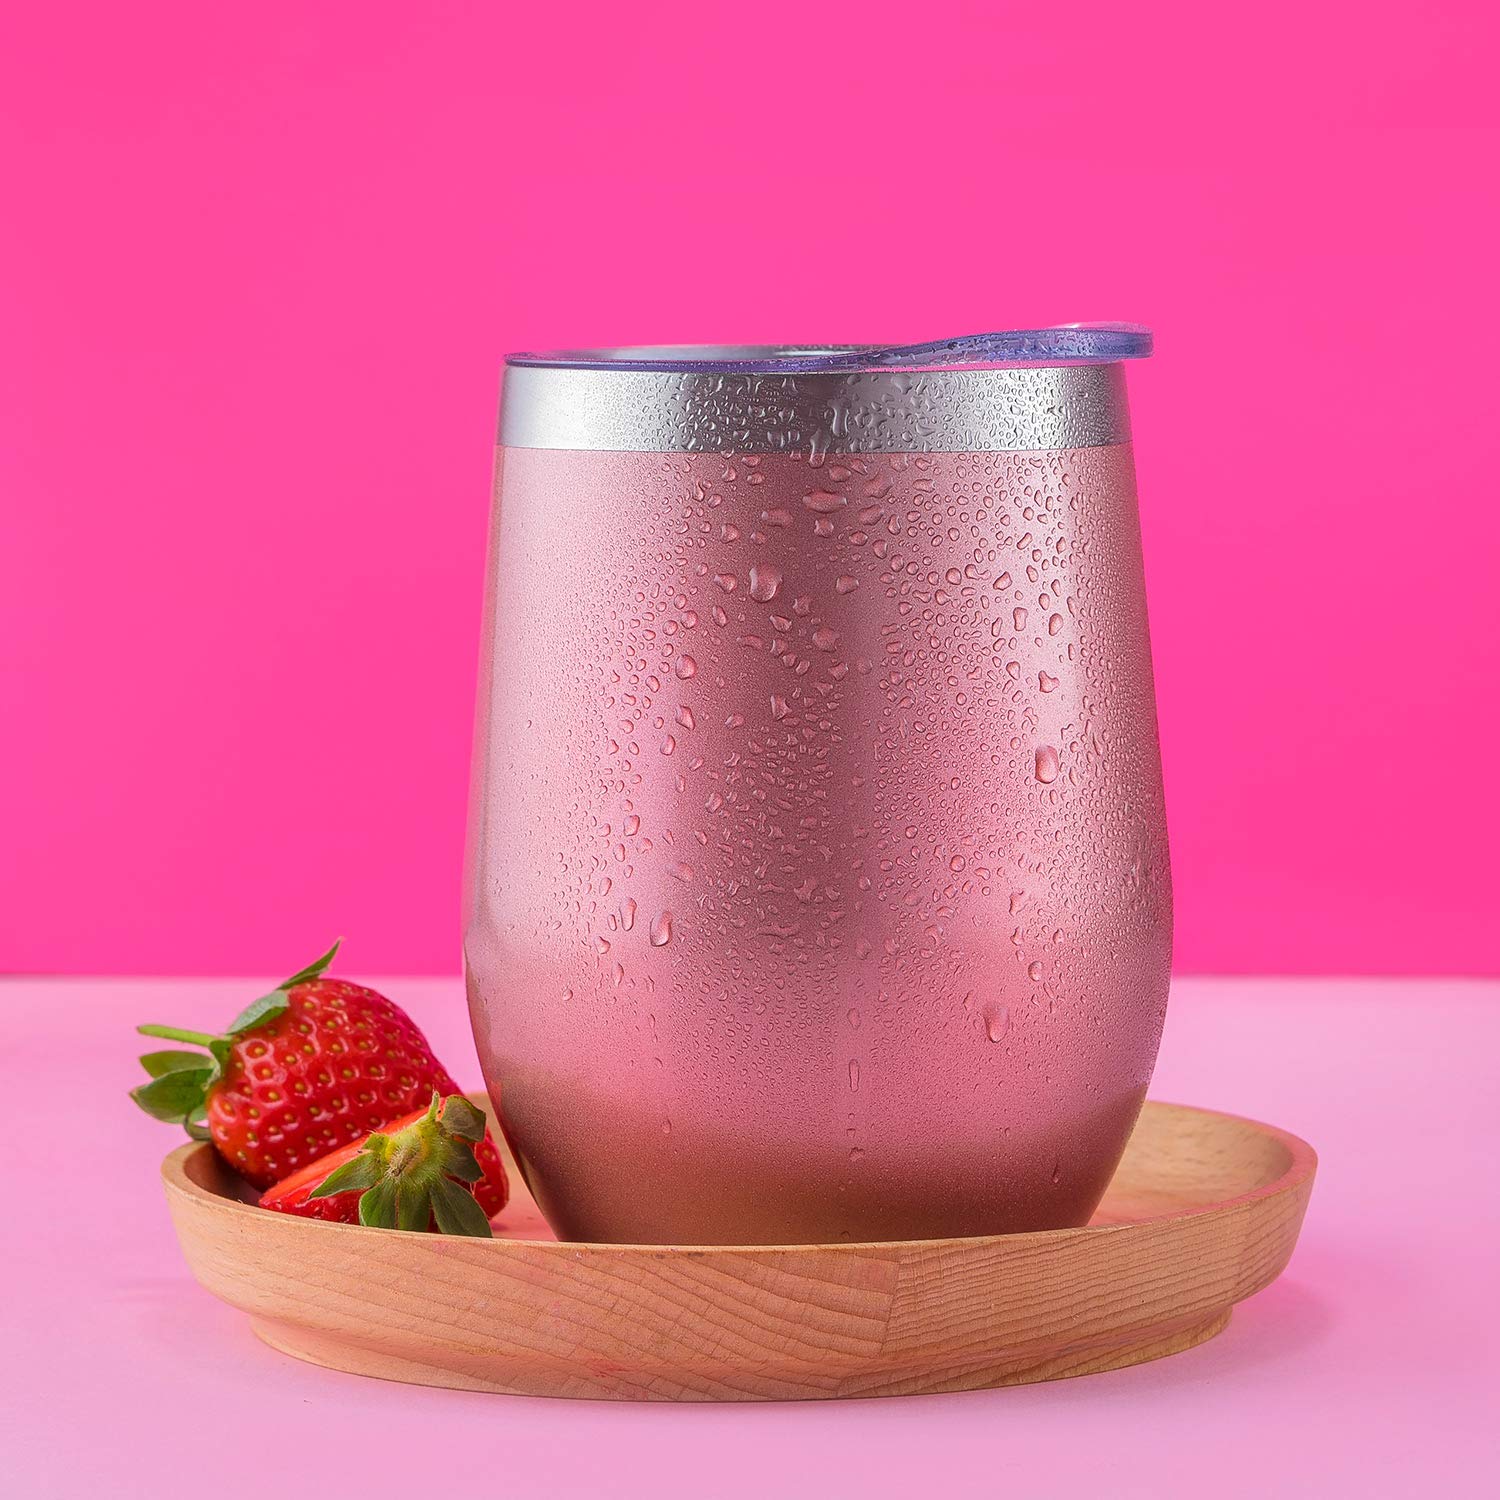
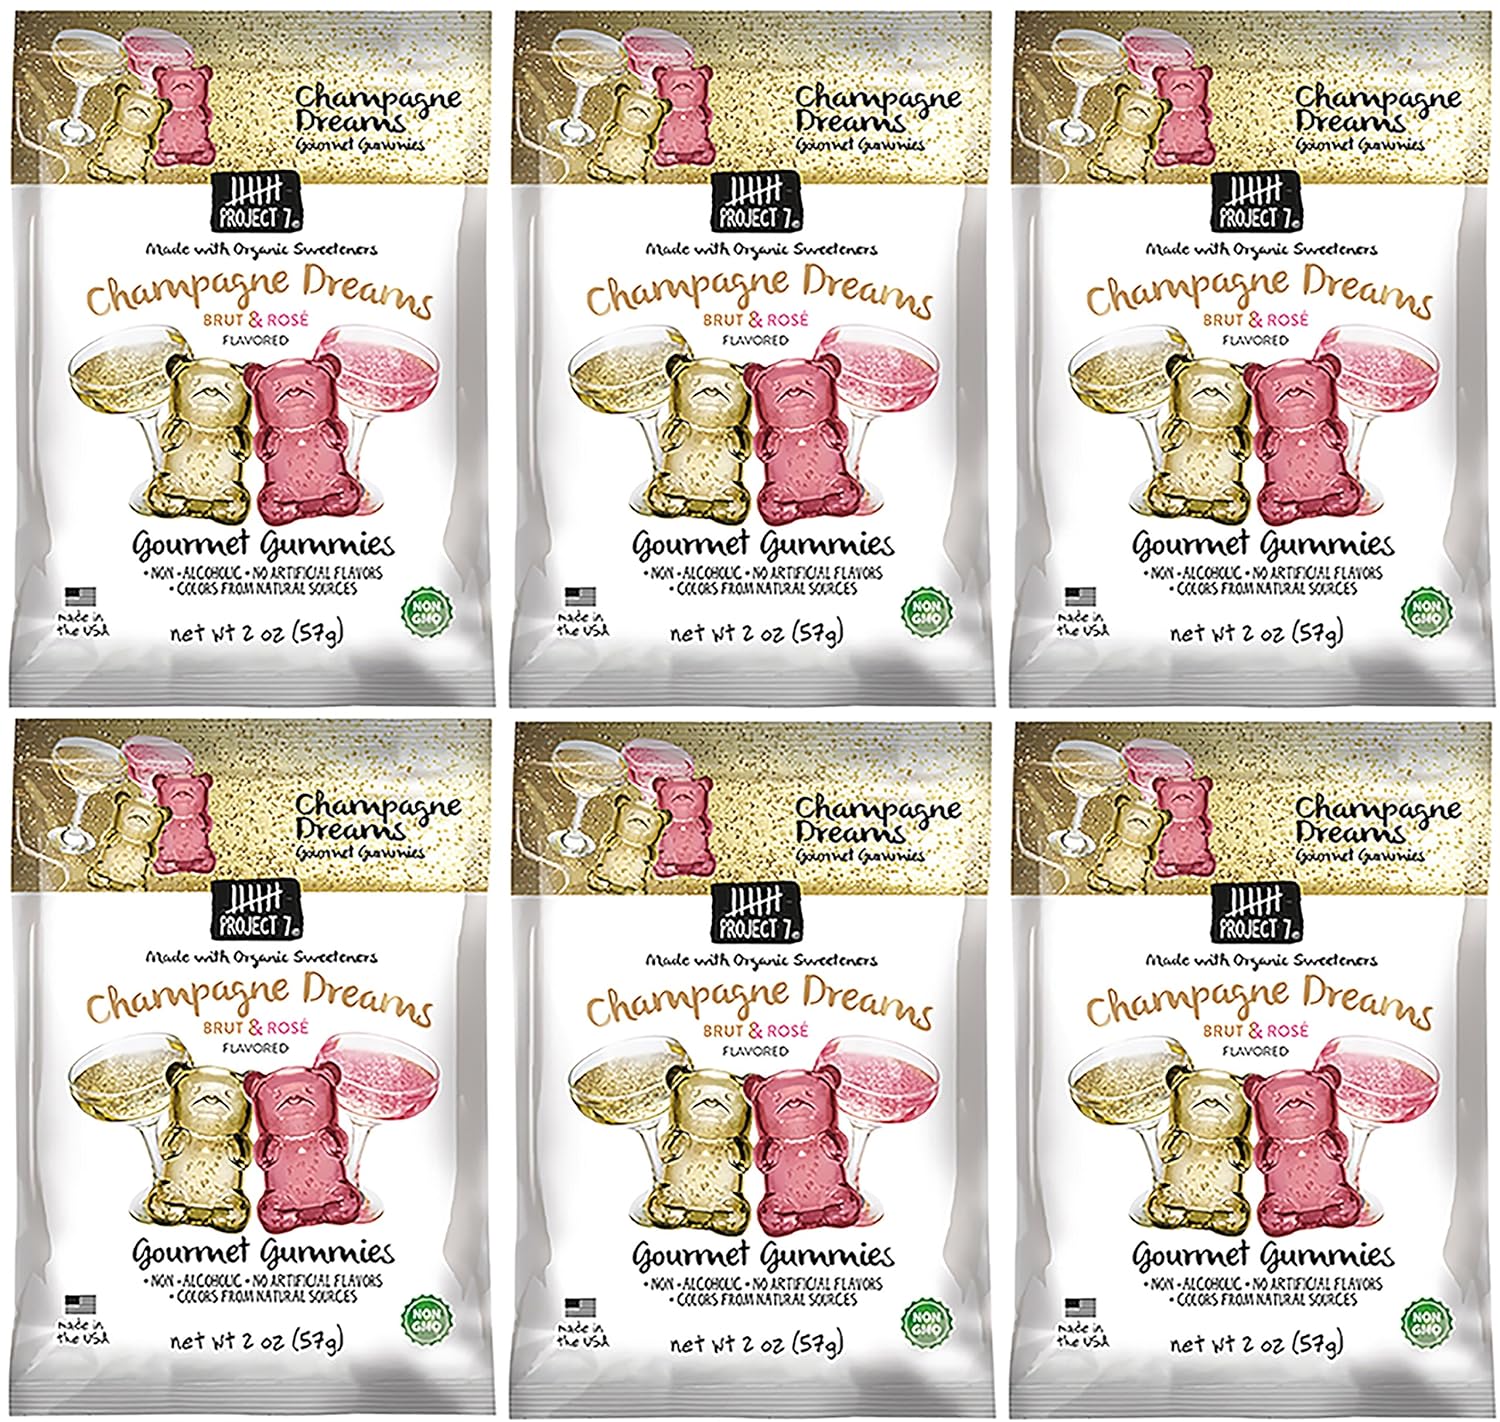
As an added bonus for the mom, I filled a stemless wine glass with some martini slushies from Costco along with a package of Champagne Gummy Bears for a bit of fun.
Last minute shopping? No problem, we rounded up some great Mother’s Day items that are all Amazon Prime eligible and sure to get to that special mom in time.
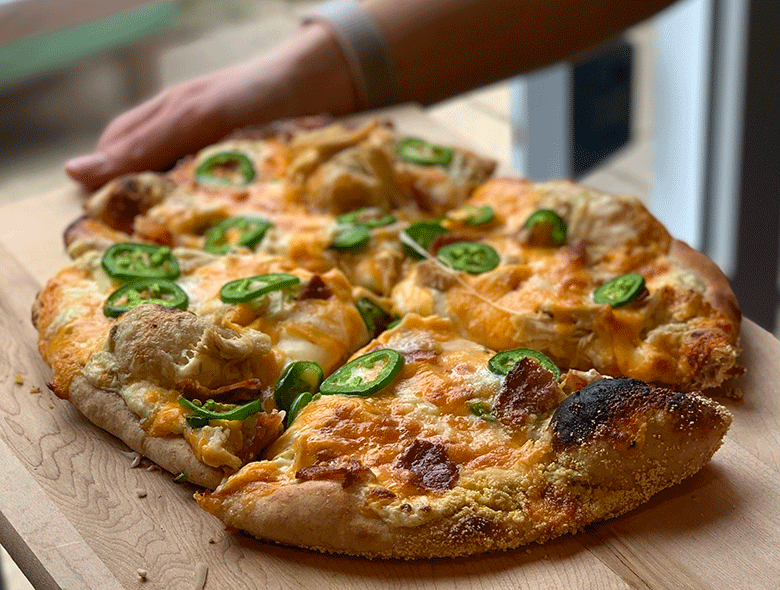
Guys, I love jalapenos. I didn’t used to, in fact as a kid I hated them. But I’ve gracefully aged a few years and have grown to love the spicy little peppers and pretty much everything made with them. So naturally, I thought jalapenos and pizza make a perfect combo, right? That’s why, when I came across a recipe for Jalapeno Popper Pizza over at The Wood Fired Enthusiast, I knew I had to try it.
Now, I made a few little tweaks to the recipe which I will cover here. I used all the same toppings as the original recipe, but use my own semi-whole wheat pizza dough recipe. My adapted recipe is below.
1. I made my own semi-whole-wheat pizza dough (recipe coming soon). But honestly, you can make your life easier and buy a store-made pizza dough.
2. I added shredded rotisserie chicken to my pizza to up the protein. I LOVE using rotisserie chicken in my recipes, it is a great way to use up leftover chicken because you don’t need a whole lot with the rest of the filling ingredients in this pizza.
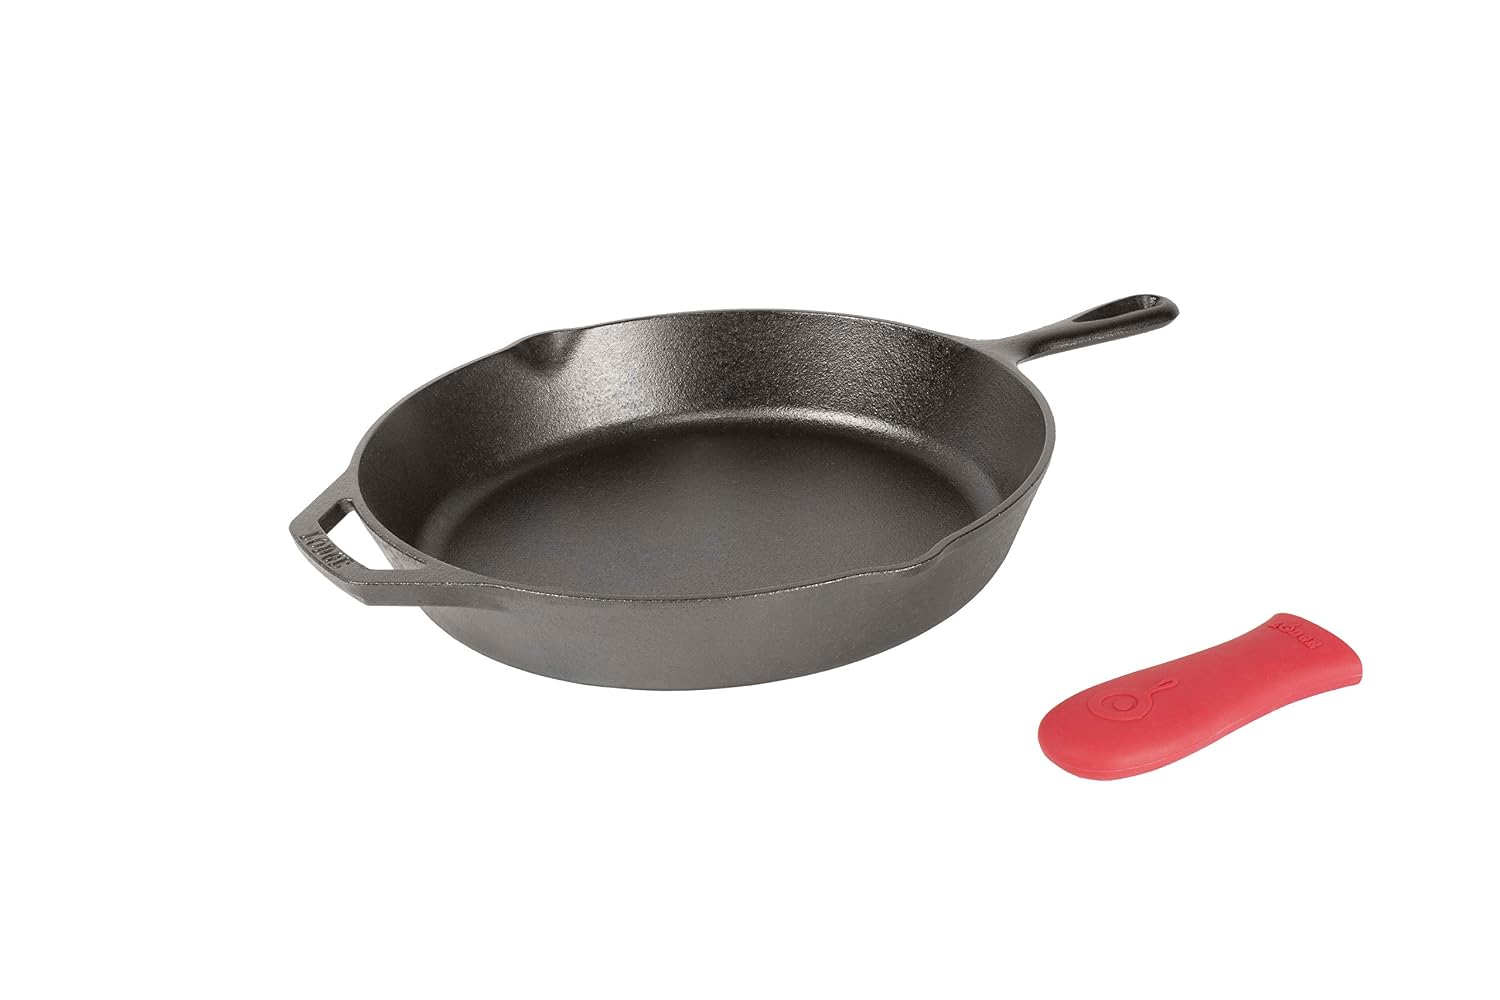
3. My special trick to cooking awesome homemade pizza – a cast iron skillet. Don’t have a pizza oven or wood fired oven? Well, neither do I. That’s why I love, love, love my cast iron skillet and it is now the only way I make pizza at home. This is the one I have and use almost every day.
Cast Iron Jalapeno Popper Pizza
Ingredients:
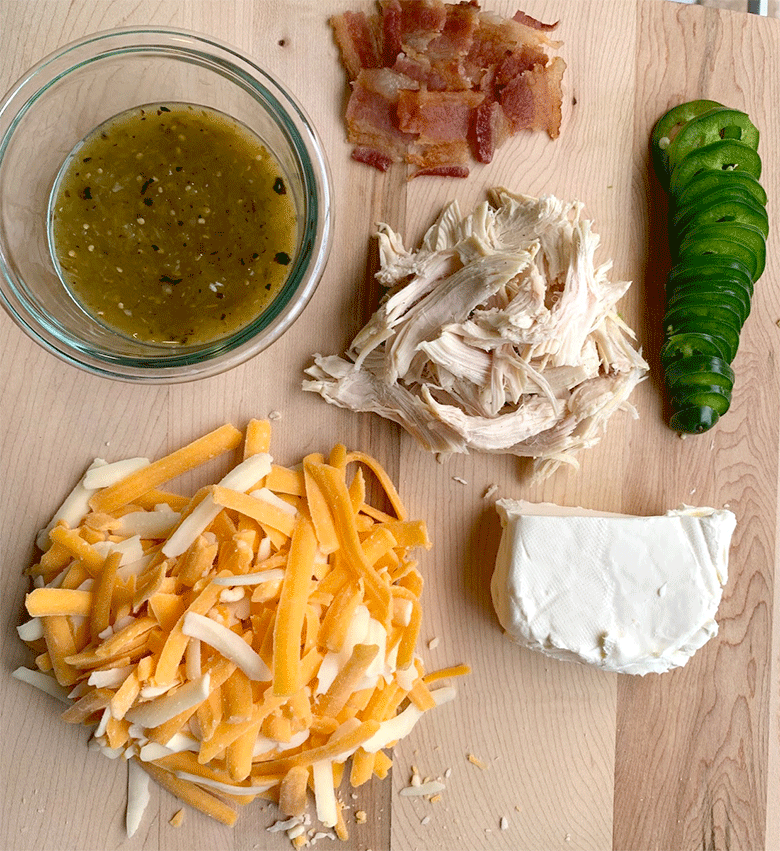
4 oz cream cheese, softened
1/4 cup salsa verde
1/4 cup shredded cheddar
1 large jalapeno, thinly sliced
1 1/2 cup shredded colby jack cheese
3 slices cooked, crumbled bacon
3/4 cup shredded or chopped rotisserie chicken
1 ball pre-made pizza dough
Recipe Process:
Roll out our your pizza dough with a rolling pin on a cutting board or large tray, something that doesn’t have a ridge or lip on it because we will be moving/sliding the pizza after it has it’s toppings. You’ll need to roll the dough to the approximate size of your cast iron pan, for me that is a 12 inch circle.
Next, because we will need to move the uncooked pizza, put cornmeal beneath the dough to help the crust move and not stick to the cutting board. It gives the crust a little crunch when cooked that I really like. Look at the picture below, you can do this easily by draping half of the dough over the rolling pin and spreading some cornmeal on the board, then lay that half of the dough back down and do the same on the other side.
Now it’s time to add the toppings. Mix the cream cheese, salsa verde and cheddar together in a bowl. This will be your “sauce.” You will layer that on the dough, followed by the chicken, bacon, colby jack cheese and finally jalapeno slices.
Our pizza is ready for baking, but first we need to warm up the cast iron skillet and the oven. Set the oven broiler on high and put the oven rack on the top rack position. Then, put the skillet on the stove over a medium-high heat with a drizzle of olive oil. By doing this before baking, the crust will get crispy on the bottom. Once the skillet is smoking hot, and I mean smoking, we are going to add our pizza. This is the tricky part. Take a large spatula, or pizza peel if you have one, and hold the cutting board with one hand over the skillet, slide the pizza onto the hot pan. Alternately, use two people; one to hold the cutting board and the other to pull the pizza onto the skillet.
During the transfer, some of the toppings may fall off or the cheese may move around. That’s OK, just put whatever needs to be fixed back in place. Once on the skillet, let the dough cook for about 45 seconds to 1 minute, then transfer the entire skillet to the oven under the broiler. Let the pizza broil for about 4-5 minutes.
Every oven is different. Be sure to check it’s progress frequently. Take the pizza out when cheese is slightly browned and melted. Enjoy!
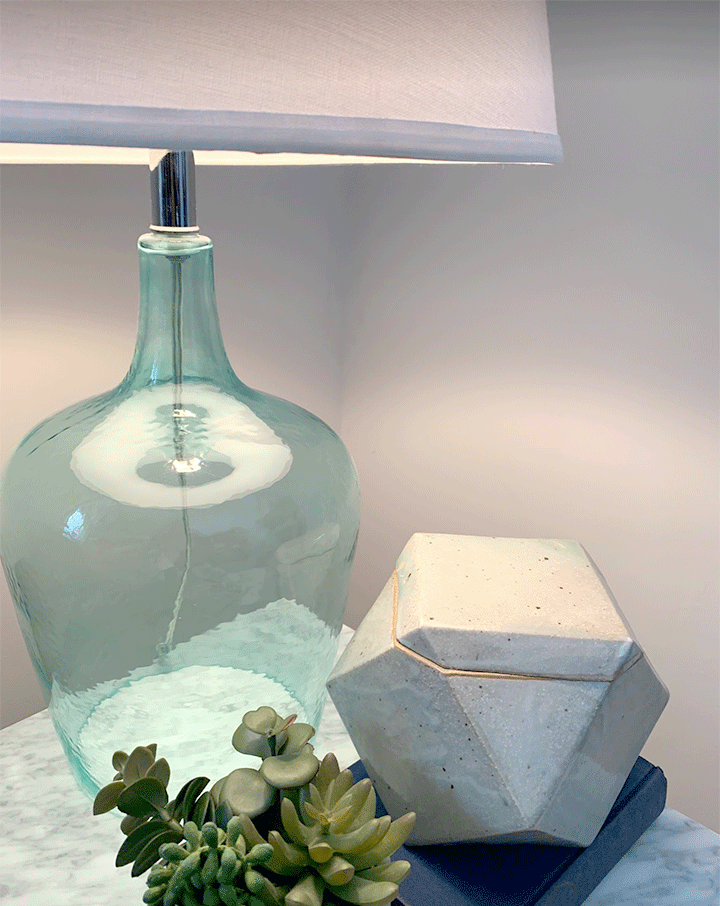
Our house definitely doesn’t have one style to define it. A little modern farmhouse, add some traditional elements, marble, different wood tones and more I just like different objects, textures and looks. And, lot’s of gray and white, especially in our family room. We have a gray couch, white walls, a slate gray fireplace, and white and gray marble tile surround. So with that in mind, I wanted to start bringing in more color to liven things up a bit. To do that, I purchased these OK Lighting teal glass lamps.
Although these lamps look a little coastal in style, I like how they give my family room a lighter, airy quality. Amazon lists these lamps as “blue” in color. I do not agree with that, they are definitely a teal/sea glass color. The tone of the teal color mixes in nicely with the cool grays and whites in my decor. The shade is a slight off-white, I do not consider it cream like some reviewers. The bottom of the lamp is open and the glass has a slight ripple texture to it.
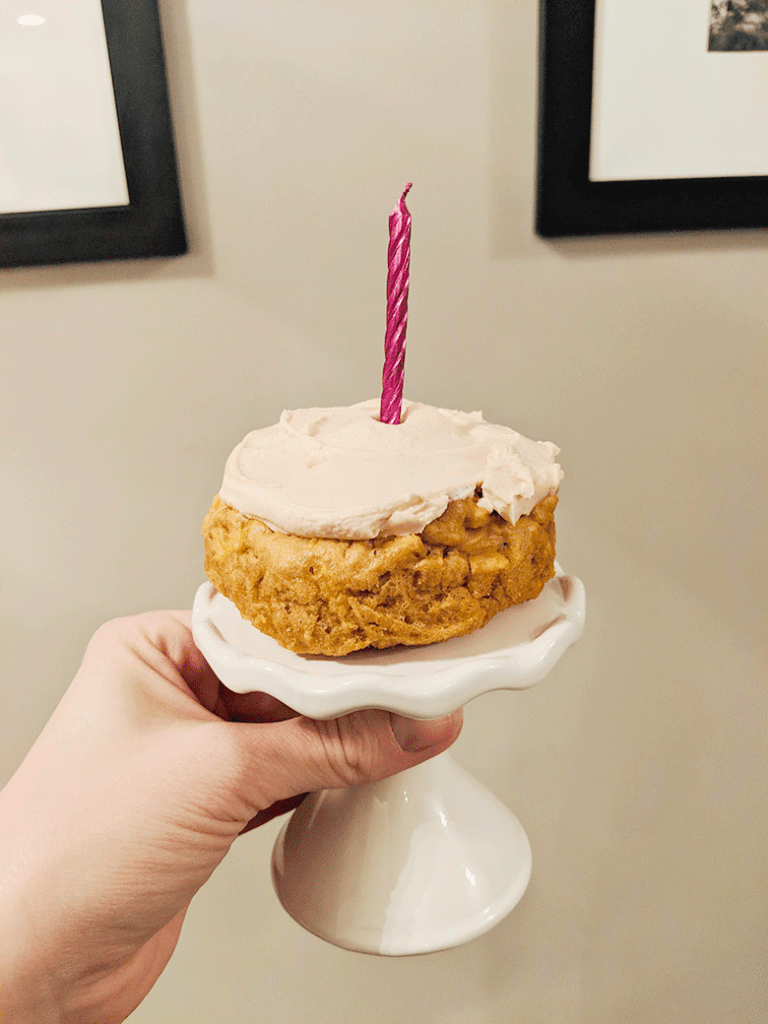
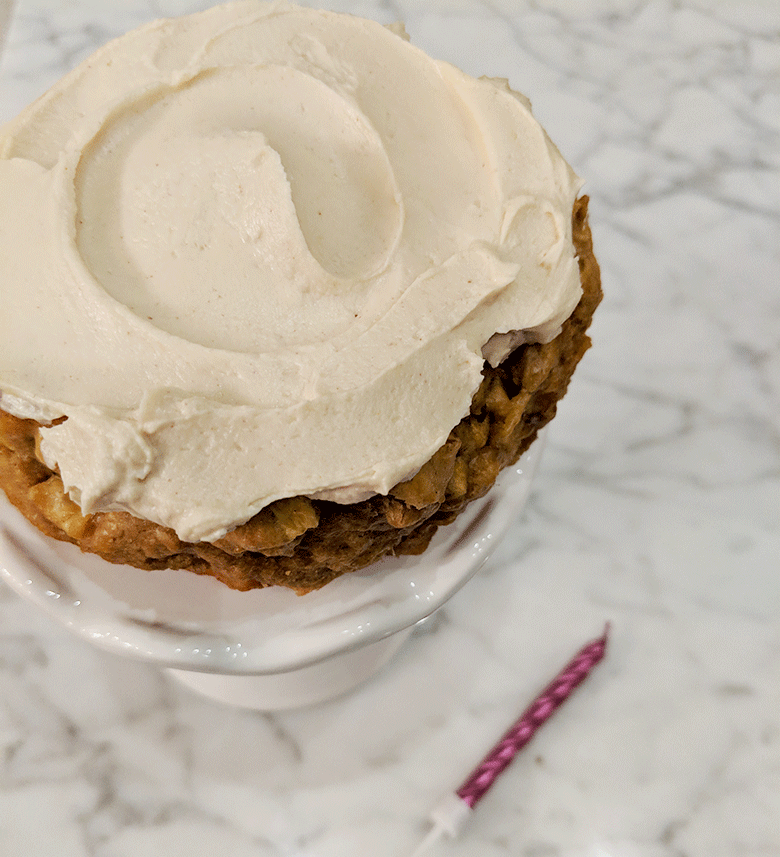
My dog’s 10th birthday – she was a little confused!
Dog owners out there, this post is for you! Our dog recently celebrated her 10th birthday and my kids wanted to do something special, she is their best friend after all. After thinking up different places we could take her we decided, because it was a cold and rainy day, we would make her a small cake and party hat as a way to celebrate. My daughter’s quickly went to work decorating a piece of paper to make a hat worthy of their superdog while I went to work baking.
Well, not right away. First I had to scour the internet for a cake recipe that was both healthy for my dog and only used ingredients I already had at home. That is when I found this recipe at a blog called Spoonful of Sugar Free, which has some pretty good human recipes as well.It had everything I was looking for. Specifically, this cake only has 4 ingredients (egg, apples, peanut butter and baking powder), all of which my dog likes and can eat. The cake bakes easily in 20 minutes, and because I didn’t have a small cake pan, I used a piece of tinfoil that I folded into the shape of a circle.
As I got to work baking I realized the only thing missing to make this cake complete was the frosting. The cake recipe I had found didn’t include frosting so I decided to improvise.
Simple Dog Cake Frosting Recipe
Ingredients: 1/4 cup natural peanut butter 1/4 cup plain greek yogurt
Process: Really simple, just mix the two ingredients until they are combined and creamy. Store in the refrigerator or use immediately. And that’s it! Once the two ingredients came together it looked like real buttercream frosting!
My kids cut and taped their decorated paper into the shape of a hat while I frosted the finished cake and tada! A celebration fit for an amazing dog.